
10 Burnt Orange Nail Designs I Painted at Home
Burnt orange nails are my go-to the moment the weather turns. The shade is warmer than red, softer than a true orange, and it flatters almost every skin tone. These are the 10 burnt orange nail designs I painted this fall. Every one is done in gel polish and cured under a UV lamp, and every photo is my own.
Quick picks: which burnt orange nails to try first
- Easiest: glossy burnt orange (#1) or aura (#9)
- Short nails: 70s swirls (#10)
- Most eye-catching: cat eye (#7) or glazed chrome (#4)
- Most fall: tortoiseshell (#3) or autumn leaf (#8)
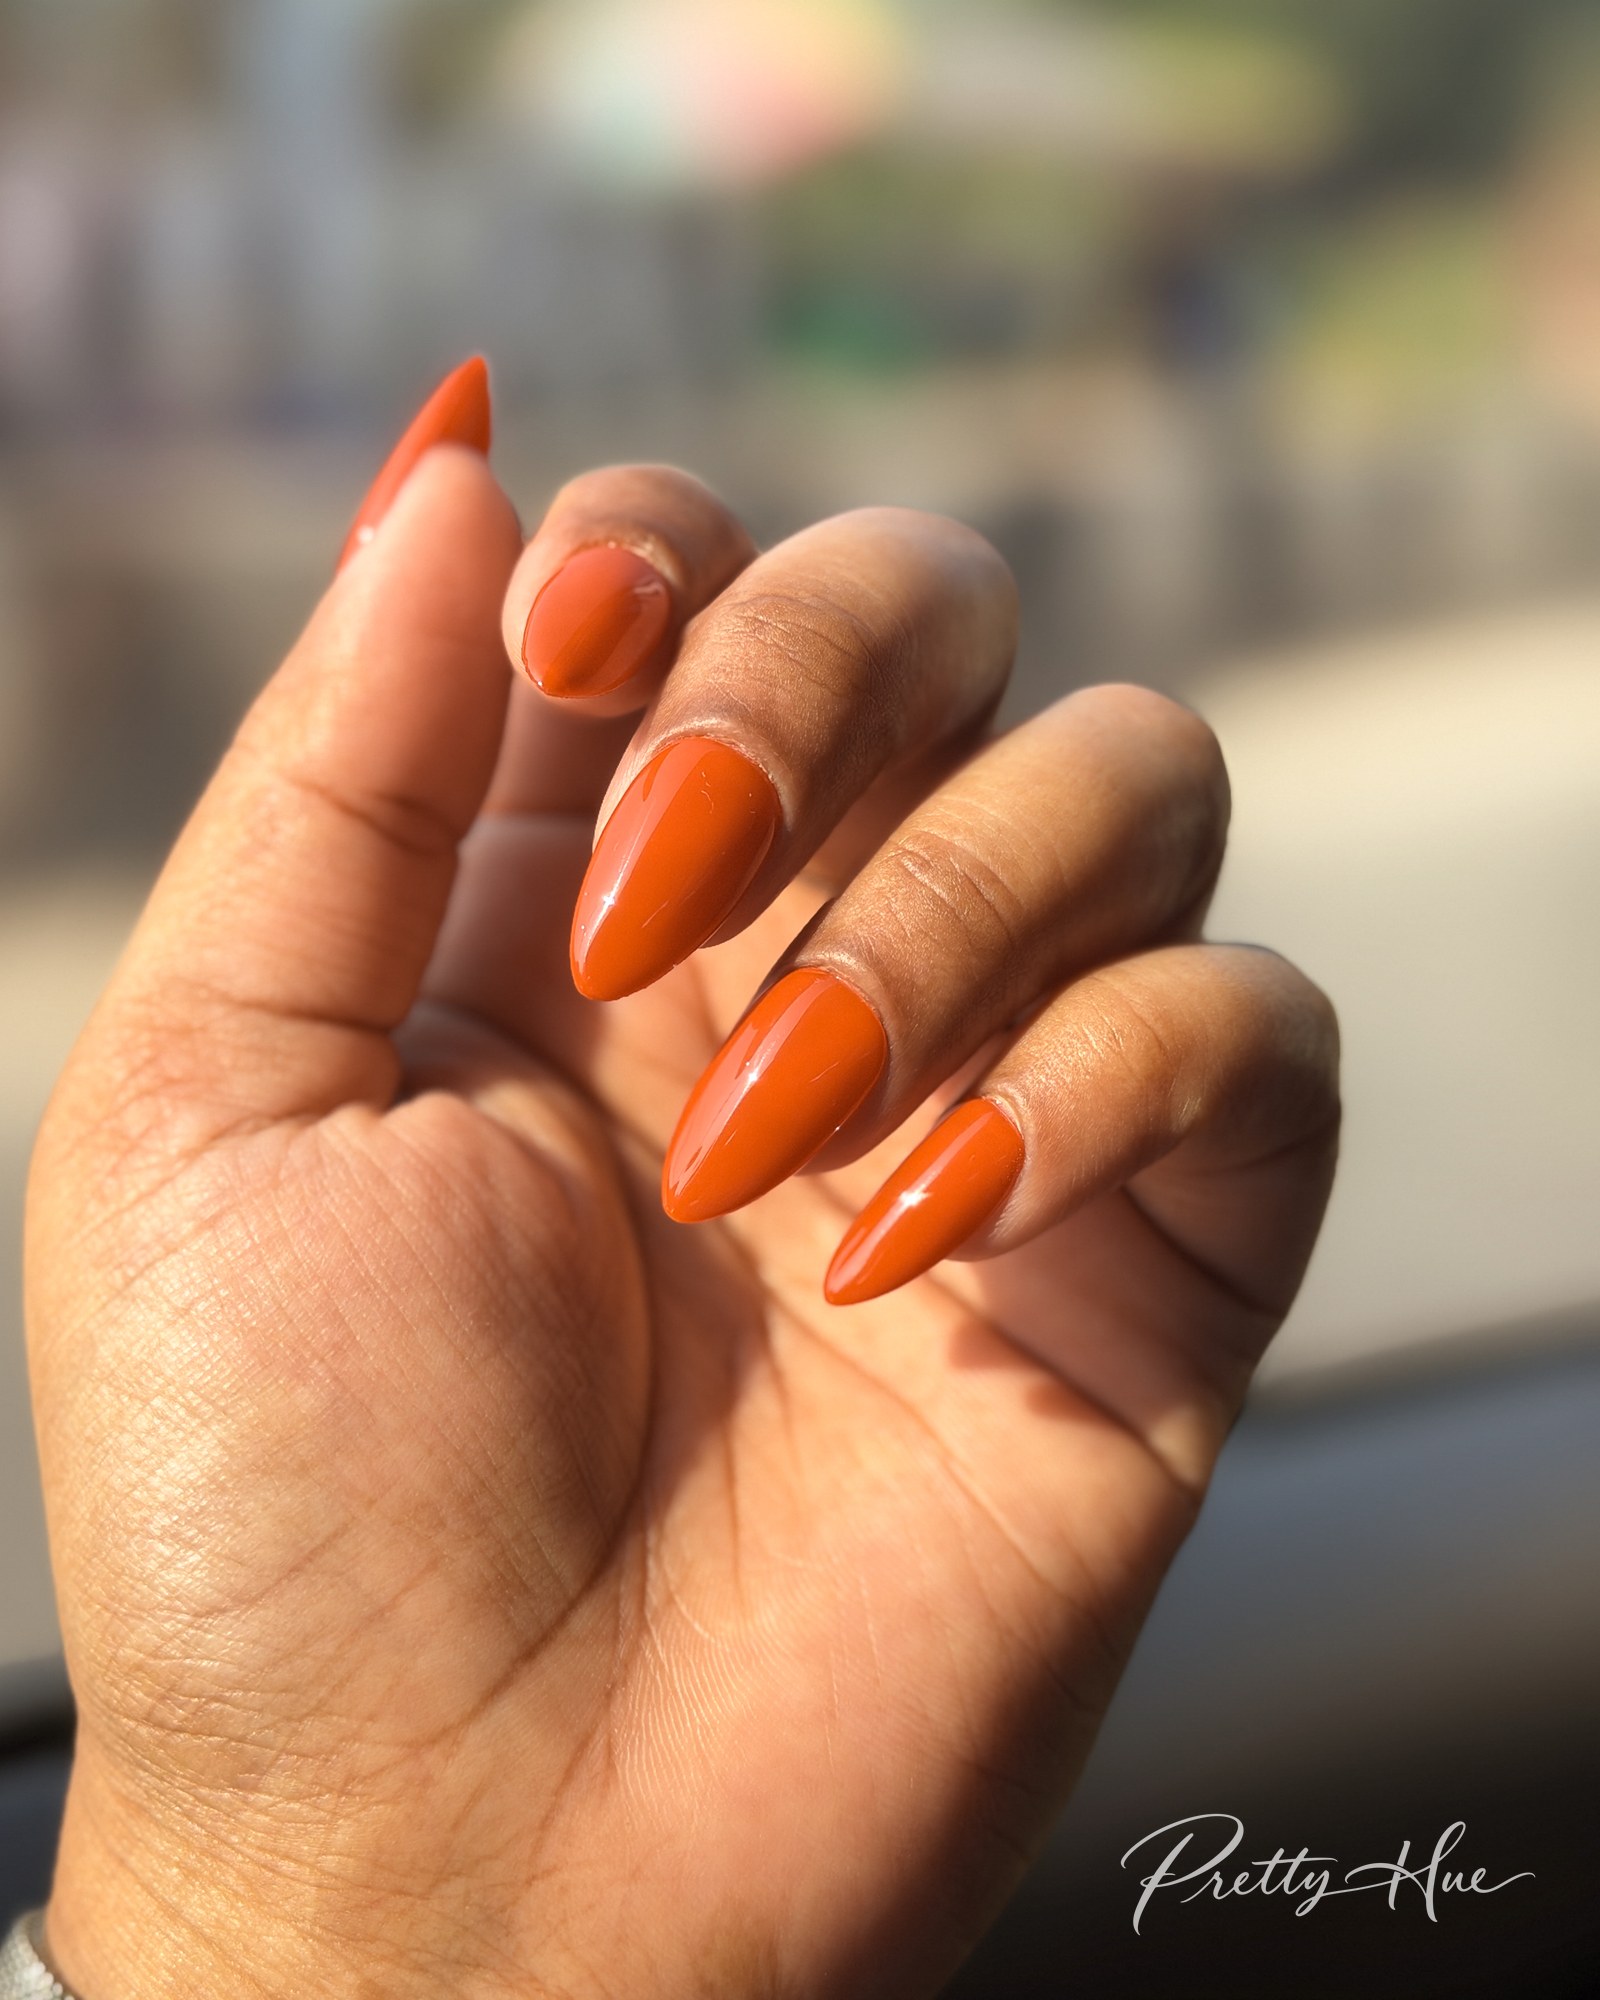
1. Glossy burnt orange almond nails

Shape Almond · Length Medium · Technique Solid gel color · Time About 45 min · Level Beginner
One glossy color on almond nails, and honestly it didn’t need anything else. In the shade it reads as a deep rust, and in direct sun it glows bright orange.

How I painted them
- Shape the nails into a soft almond and gently push back the cuticles.
- Brush on a thin layer of base gel and cure.
- Paint a thin first coat of burnt orange gel, keeping it off the skin, and cure.
- Add a second thin coat for full, even color and cure again.
- Finish with a thick glossy no-wipe top coat, cap the free edge, and do a full cure.
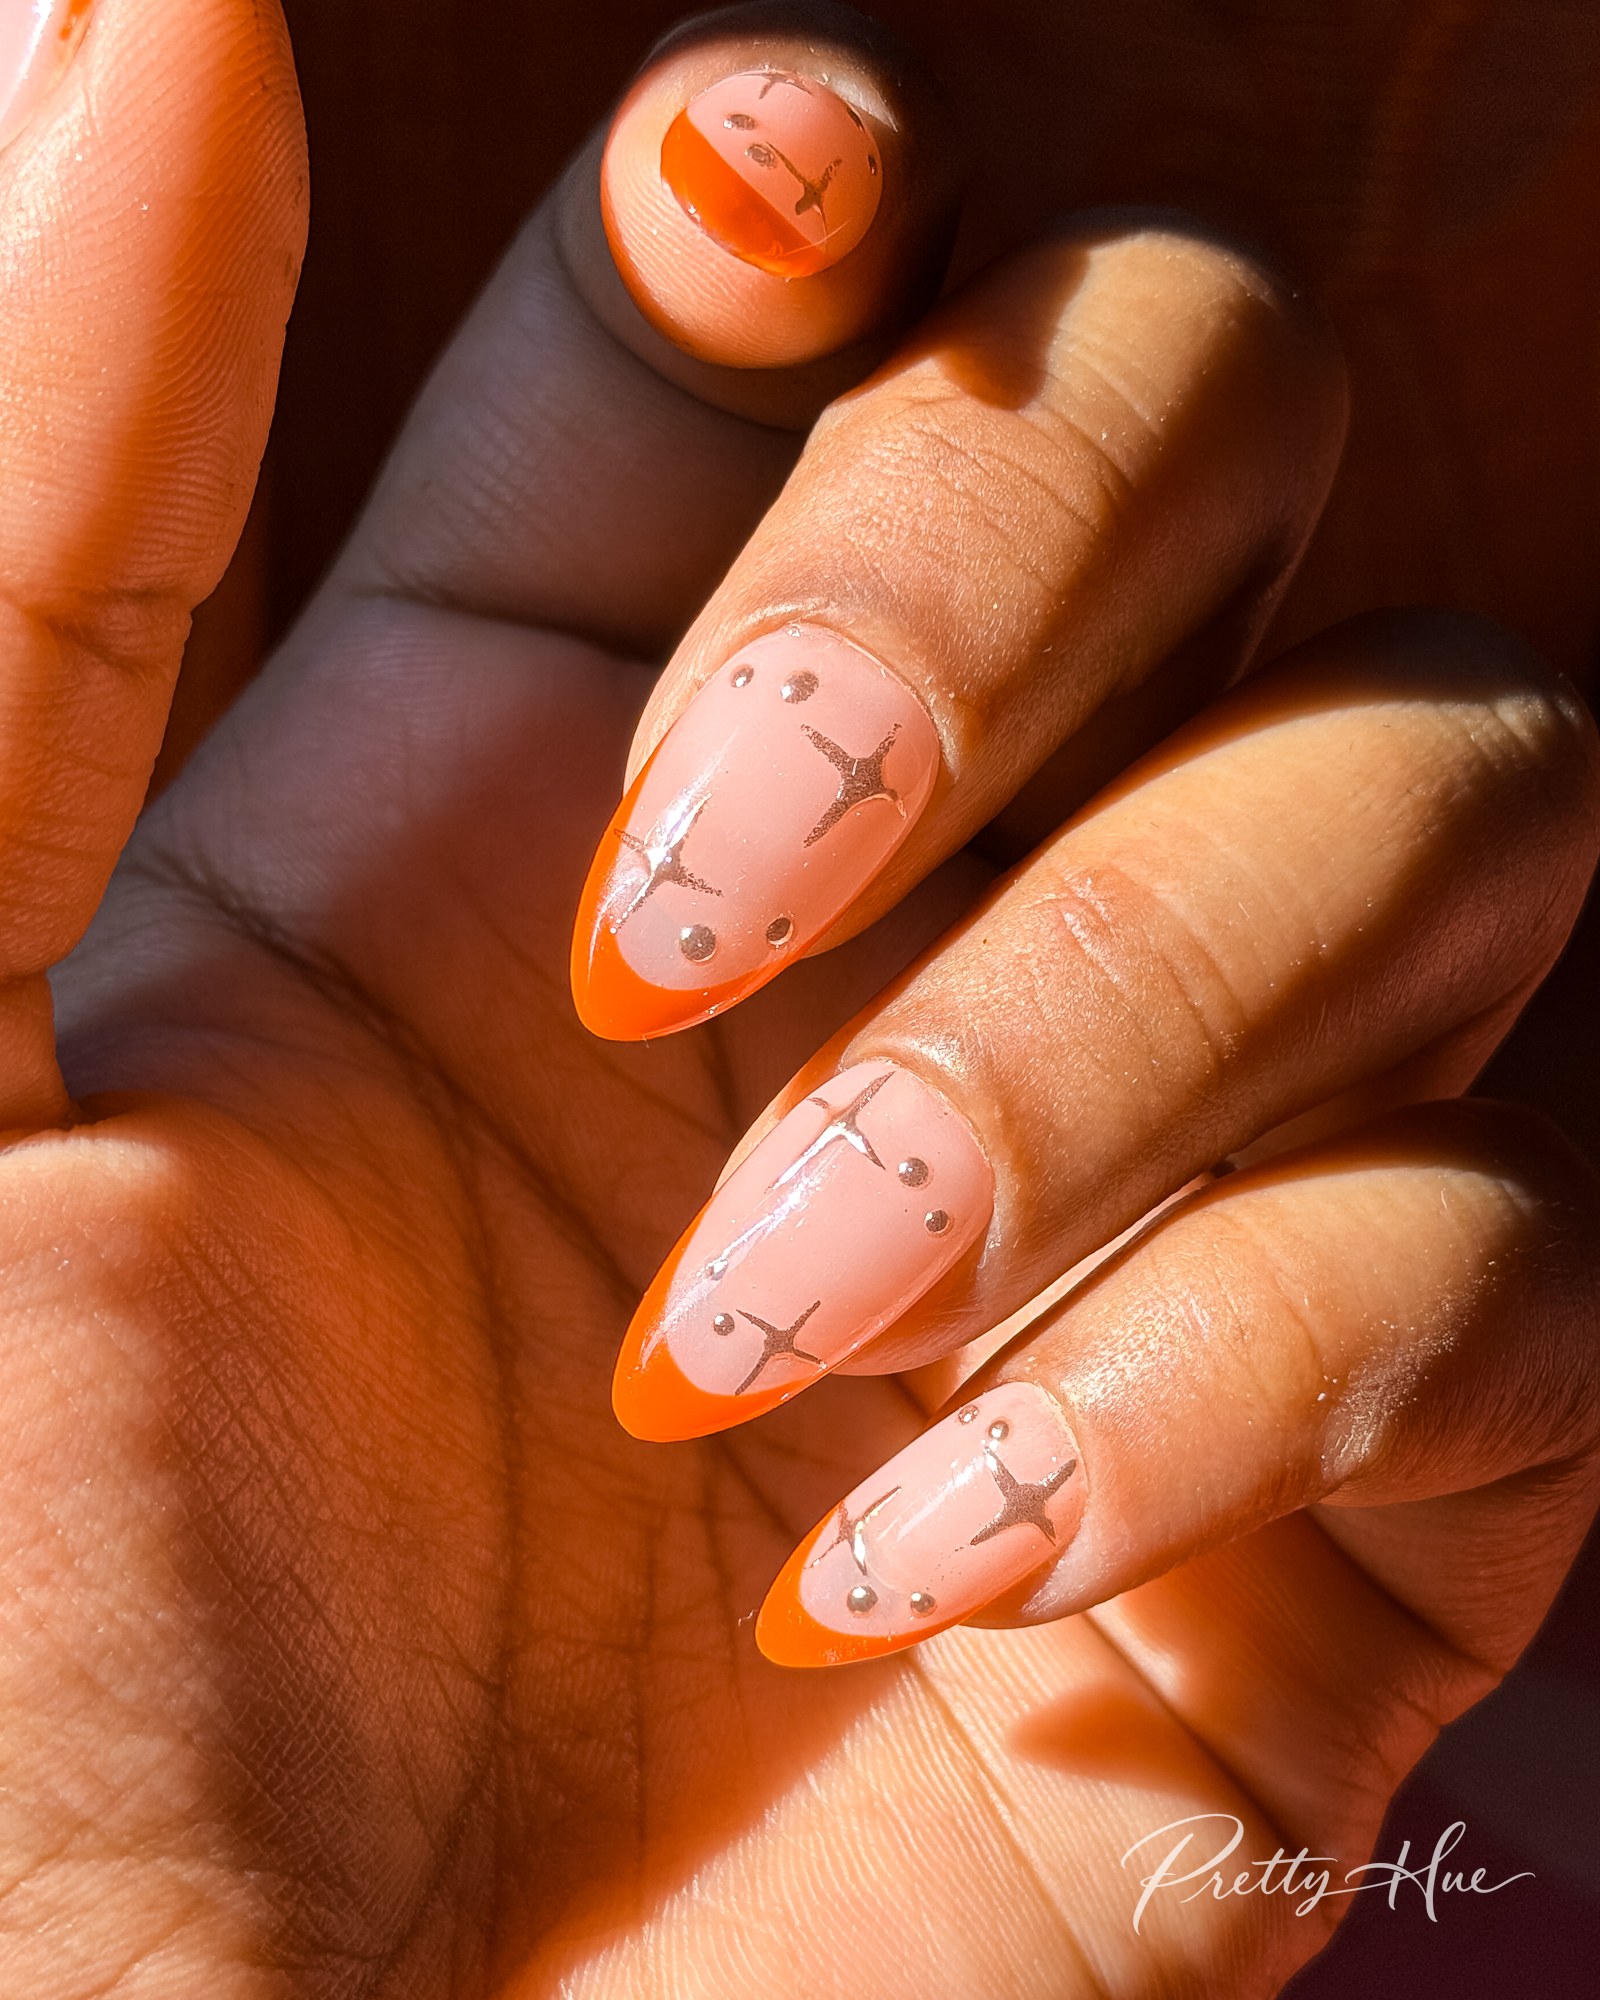
2. Burnt orange micro French tips

Shape Almond · Length Medium · Technique Micro French + nail art · Time About 45 min · Level Intermediate
A thin burnt orange line instead of white keeps a French manicure feeling like fall, and the little golden stars make it a bit more fun. In the sun the tips almost glow.

How I painted them
- Shape the nails into a soft almond and gently push back the cuticles.
- Brush on a thin layer of base gel and cure.
- Paint two thin coats of a sheer nude pink gel, curing each coat.
- With a long striping brush, pull a thin curve of burnt orange gel along each tip and cure.
- With a fine liner brush and no-wipe top coat, paint a few small four-point stars, then add tiny dots with a dotting tool and cure.
- Rub gold chrome powder over the stars so they turn gold, then brush off the extra. That is how I got the gold stars: the chrome powder only sticks to the no-wipe top coat.
- Finish with a glossy no-wipe top coat, cap the free edge and give it a full cure.
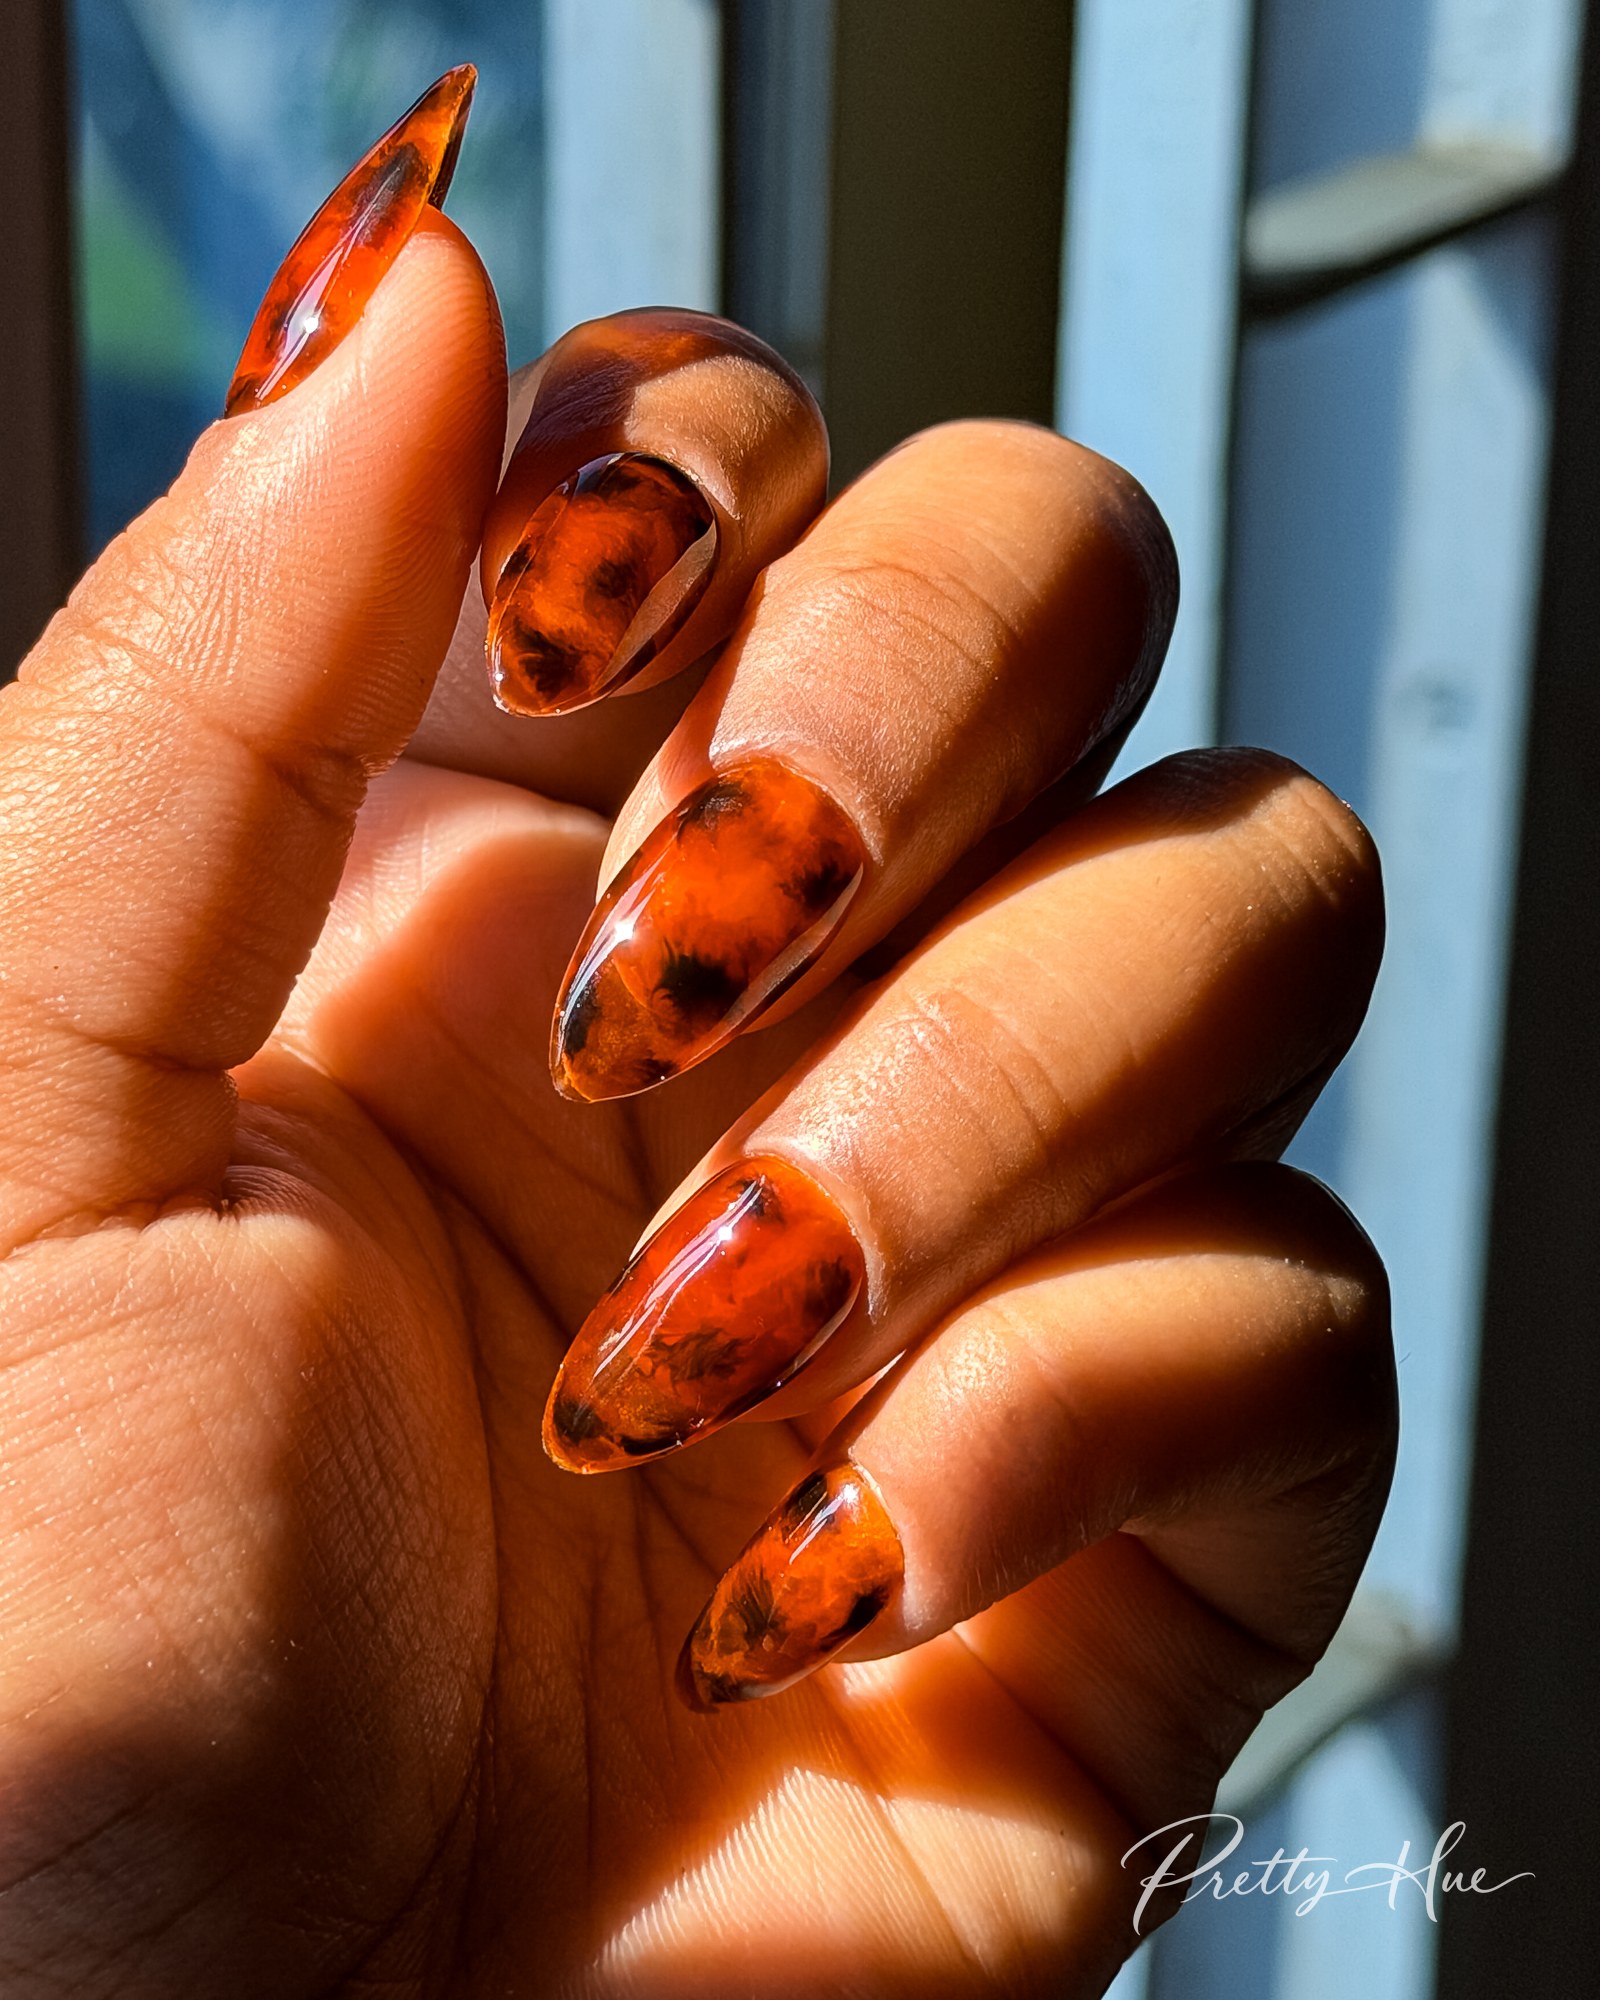
3. Burnt orange tortoiseshell

Shape Almond · Length Medium · Technique Tortoiseshell · Time About 1.5 hrs · Level Intermediate
Amber jelly with soft brown patches and a few black spots, all worked wet so they melt into each other and look natural. This time I had the exact shades I needed, so I didn’t have to mix a custom colour. I kept the steps simple too, so the look doesn’t depend only on the blooming gel.

How I painted them
- Paint a sheer amber jelly gel base and cure.
- Brush on a thin layer of blooming gel. Don’t cure it.
- With a small brush, dab brown gel in soft patches onto the wet blooming gel and let it spread a little. Don’t cure this either.
- With a separate thin brush, add a few small black spots straight on top of the uncured brown patches.
- Go back to the brush you used for the brown patches and gently blend the edges of the black spots into the brown so they soften. Blooming gel doesn’t blend them well on its own. Then cure everything together.
- Finish with a glossy no-wipe top coat and a full cure.
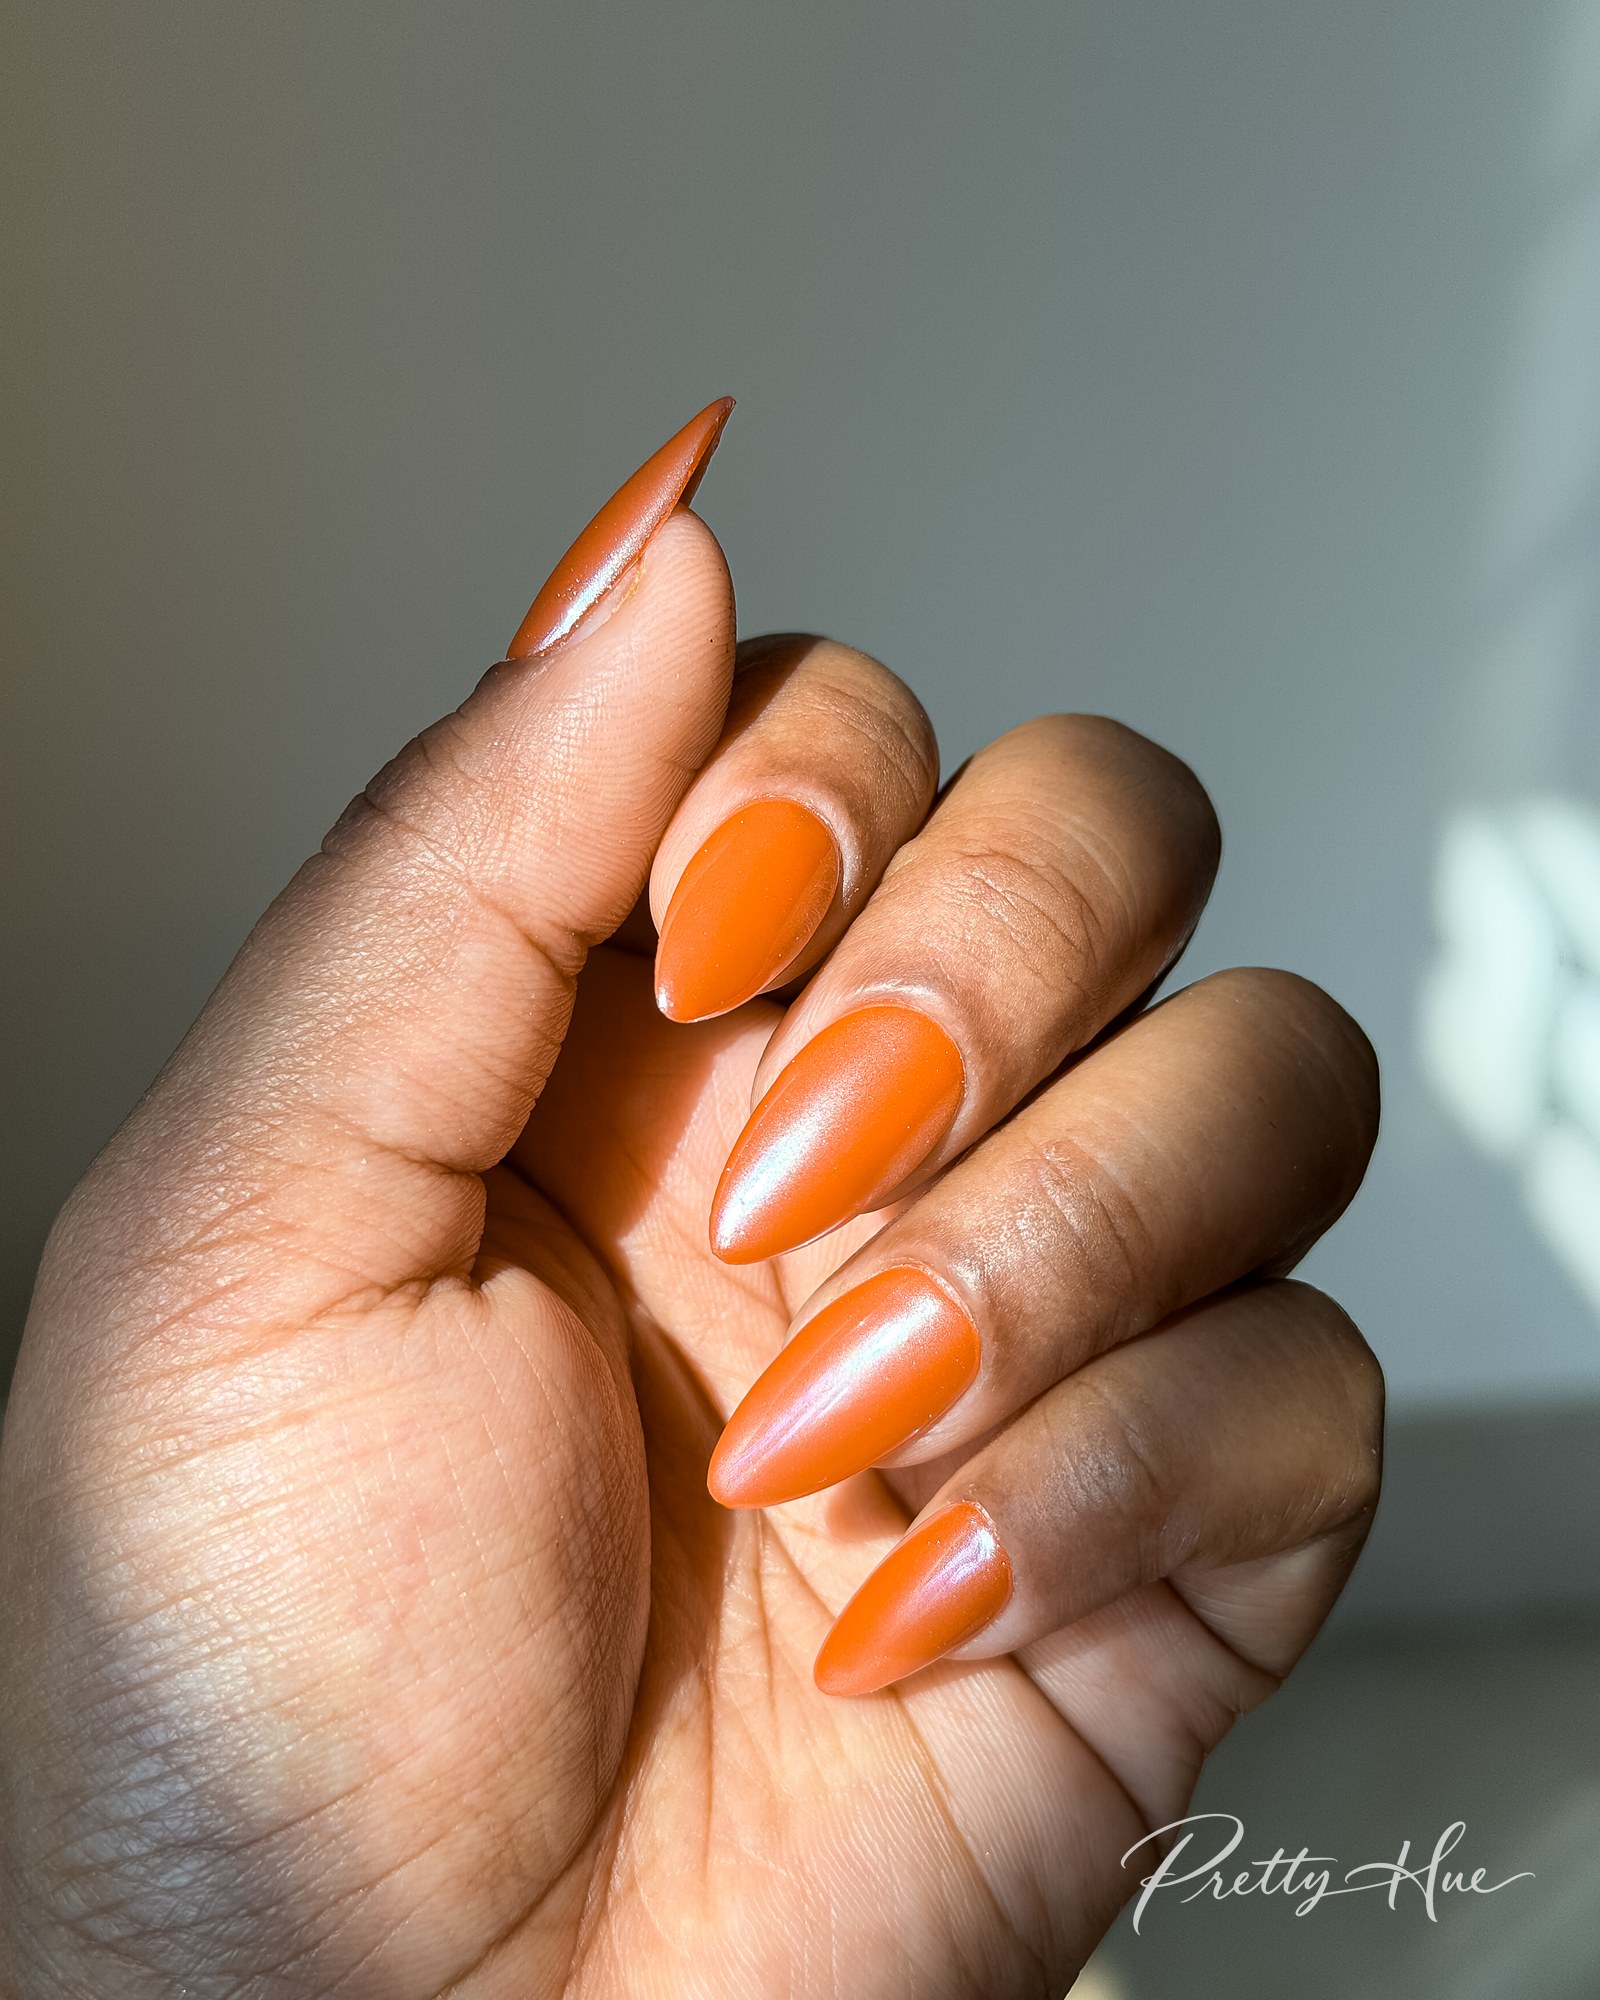
4. Glazed burnt orange chrome

Shape Almond · Length Medium · Technique Chrome · Time 35 min · Level Beginner
Pearl or chrome powder over burnt orange turns it into molten copper. In the sun the glaze shifts from orange to a soft pearly pink.

How I painted them
- Two thin coats of burnt orange gel, curing each coat.
- Apply a no-wipe top coat and cure.
- Rub pearl chrome powder over the nail with a small sponge, then brush off the extra.
- Seal with another no-wipe top coat and a full cure.
5. Burnt orange and burgundy color block

Shape Square · Length Medium · Technique Color block · Time About 45 min · Level Intermediate
Two fall shades split diagonally across each nail, with a thin gold glitter line where they meet. I switched the direction of the diagonal from nail to nail so the whole hand feels balanced.


How I painted them
- Paint every nail burnt orange gel and cure.
- With a liner brush, draw a diagonal line in burgundy gel, then fill in one half and cure. Switch the direction of the diagonal on every other nail.
- Paint a thin line of gold glitter gel along the diagonal where the two colours meet, then cure.
- Finish with a glossy no-wipe top coat and a full cure.
6. Matte burnt orange with glossy tips

Shape Coffin · Length Medium · Technique Matte + gloss · Time About 35 min · Level Beginner
Same color, two finishes. The whole nail is a soft matte burnt orange and only the tips are glossy, so the French line shows up as a shine instead of a second color. It looks best in sunlight, when the glossy tips catch the light.

How I painted them
- Paint two thin coats of burnt orange gel, curing each coat.
- Apply a Russian manicure matte top coat over the whole nail and cure.
- With a small flat brush, paint a glossy no-wipe top coat along the tips in a French line, then cure.
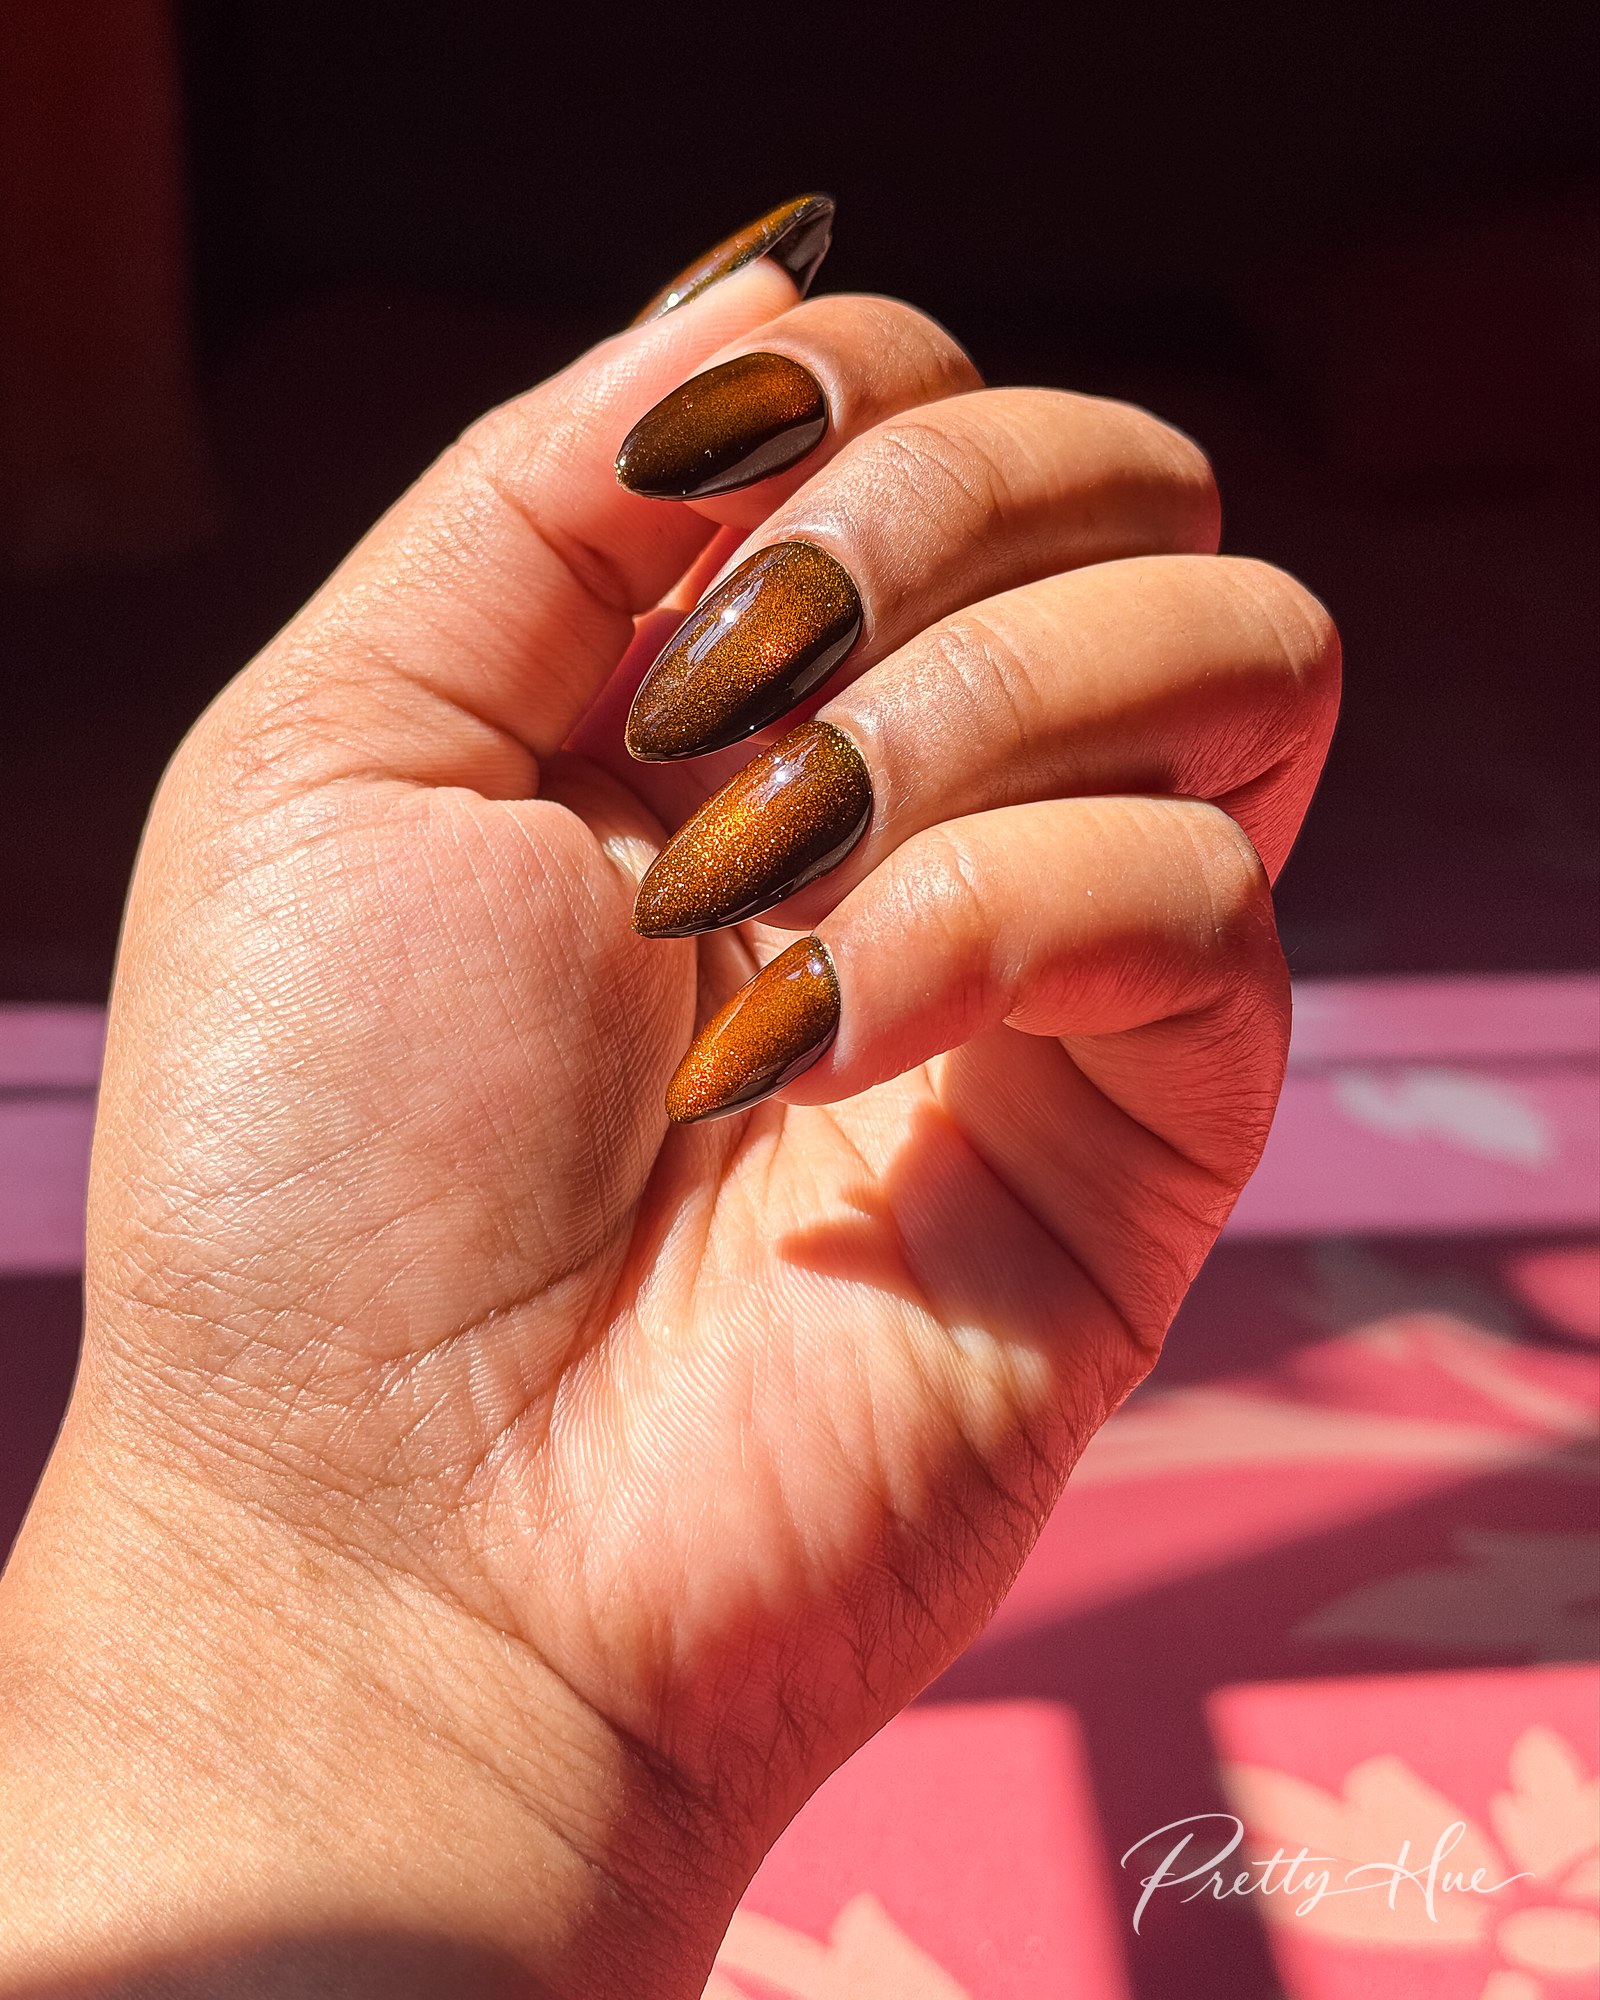
7. Burnt orange cat eye

Shape Almond · Length Medium · Technique Cat eye · Time About 35 min · Level Intermediate
A dark brown base with copper-orange cat eye gel on top. A magnet pulls the shimmer into a glowing band down each nail, so it looks like an ember every time you move your hand.

How I painted them
- Paint a dark brown gel base and cure.
- Apply one coat of copper-orange cat eye gel, hold a magnet close for about 10 seconds to pull the shimmer into a band, then cure.
- Repeat with a second coat for more depth and cure.
- Finish with a glossy no-wipe top coat and a full cure.
8. Autumn leaf accent nail

Shape Almond · Length Medium · Technique Freehand art · Time About 45 min · Level Intermediate
Glossy burnt orange on four nails and one cream accent nail with a little branch of hand-painted leaves in orange, yellow and brown. Simple enough for a first nail art try, and very fall.


How I painted them
- Paint four nails burnt orange gel and the accent nail a cream gel, curing each coat.
- With a thin liner brush, paint a fine stem down the accent nail and cure.
- With a pointed silicone tool, dab small teardrop leaves along the stem in brown, orange and yellow gel, curing after each color.
- Finish with a glossy no-wipe top coat and a full cure.
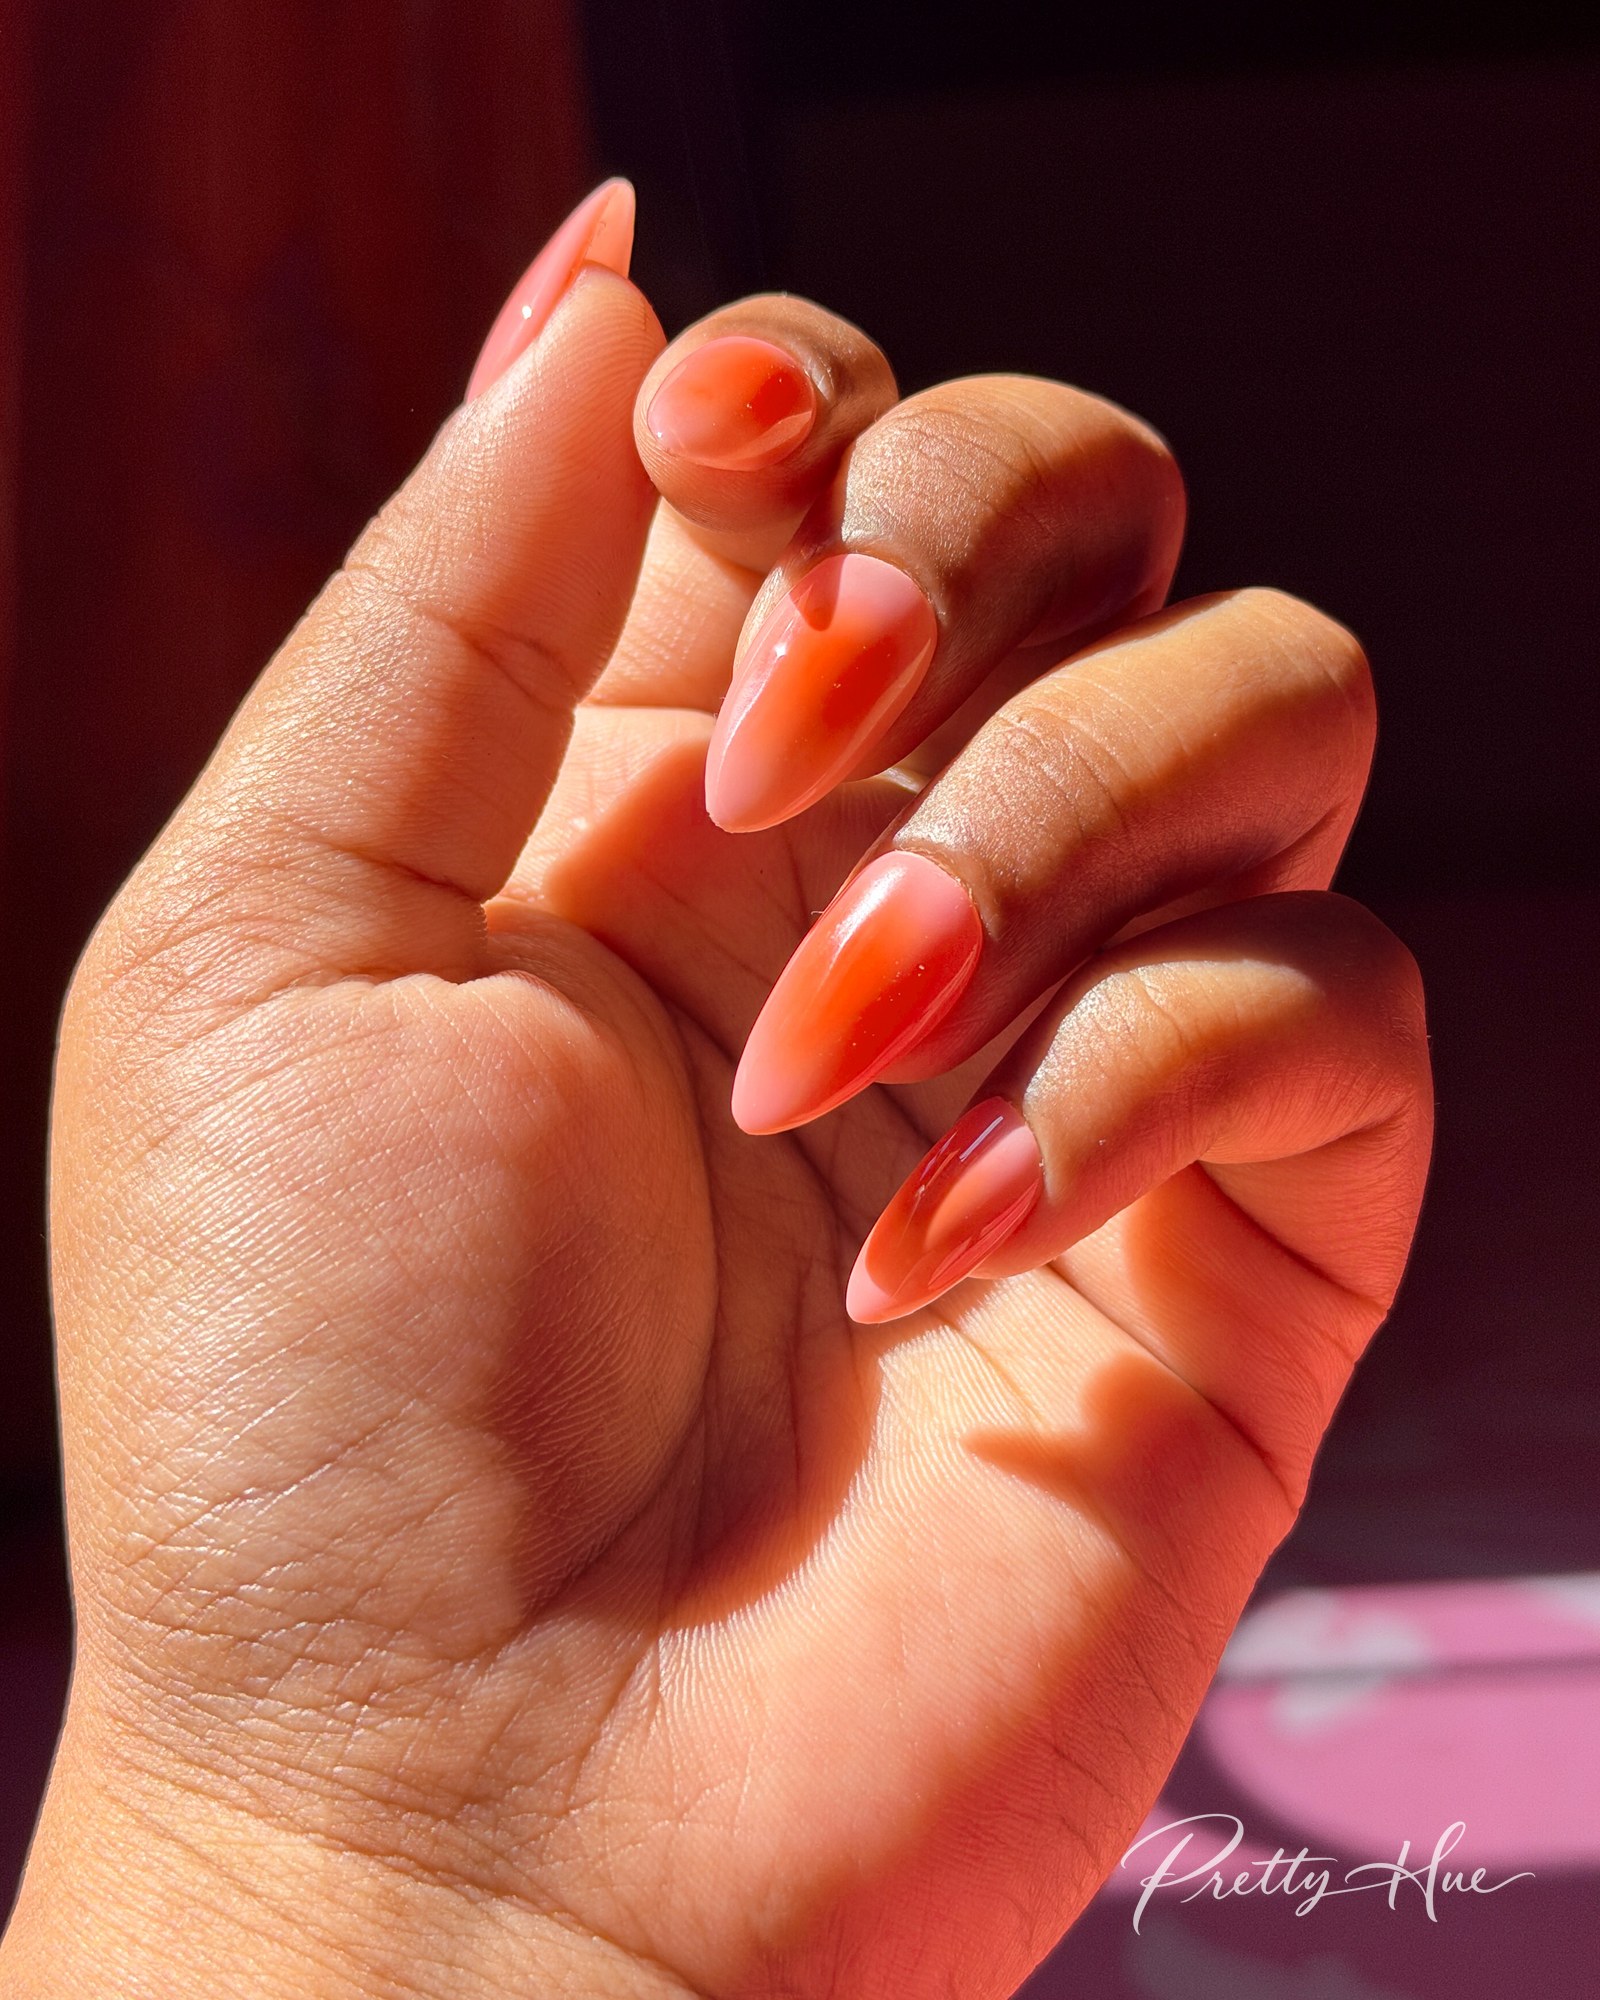
9. Burnt orange aura nails

Shape Almond · Length Medium · Technique Aura · Time About 35 min · Level Beginner
A soft burnt orange glow fading out from the centre of each nail into a sheer nude edge. In the sun it looks like each nail is lit from inside, and it’s all done with eyeshadow and a small sponge.
How I painted them
- Paint two coats of sheer nude gel, curing each coat.
- Apply a Russian matte top coat and cure. The matte, dry surface makes it much easier to work the colour onto the nail.
- I don’t have a patting gel paint, so I used a burnt orange eyeshadow from a palette instead. Dab it into the centre of each nail with a small sponge.
- Blend the edges outward with a clean side of the sponge. Don’t use the side that already has colour on it, or it will ruin the soft fade.
- Then seal the design with a glossy no-wipe top coat and give it a full cure.
10. 70s burnt orange swirls

Shape Square · Length Short · Technique Swirls · Time About 50 min · Level Intermediate
Retro wavy lines in burnt orange, mustard and chocolate brown on a creamy base. Every nail is a little different, which is what makes it look so 70s.


How I painted them
- Paint a creamy white gel base and cure.
- With a thin liner brush, paint one wavy band in burnt orange and cure.
- Add the next waves beside it in mustard yellow, curing after each colour.
- Outline the waves with a fine chocolate brown line and cure.
- Finish with a glossy no-wipe top coat and a full cure.
What colors go with burnt orange nails?
Burnt orange nails pair really well with other warm, earthy shades like burgundy, chocolate brown, mustard, olive and cream. It also looks great with gold jewelry. For contrast, try it next to deep teal or navy.
Do burnt orange nails suit every skin tone?
Pretty much. Burnt orange nails flatter most skin tones: on fairer skin, a browner, more muted shade looks softer, while medium and deeper skin tones can carry the brighter, glossier versions beautifully, especially in sunlight.
Do burnt orange nails work on short nails?
Yes. Burnt orange nails look neat and polished even when they are short, because the color is so rich. Keep the shape soft, like a short square-oval or round. My 70s swirls (#10) are painted on short nails, so that one is a great place to start.
Looking for more fall ideas? See my burgundy and brown fall nail designs, or these easy Halloween nails for the end of October. If you try any of these burnt orange nails, tag me @paintedbyprettyhue on Instagram, and save this to Pinterest for your next nail day.

