
8 Burgundy & Brown Fall Nail Designs I Painted at Home
Burgundy fall nails are what I reach for first when the season turns, along with the other deep shades: cherry, chocolate and amber. These are eight sets I painted at home this season, from easy polka dots to a full tortoiseshell set, with how I did each one and roughly how long it took. Everything here is gel polish, cured under a UV lamp.
Quick picks: which burgundy fall nails to try first
- Easiest: polka dots with a bow (#3)
- Best for short nails: plaid (#2) or polka dots (#3)
- Most eye-catching: full tortoiseshell (#5) or brown and pink cat eye mismatched (#4)
- Most fall: plaid (#2) or tortoiseshell accents (#1)
1. Burgundy with tortoiseshell accents

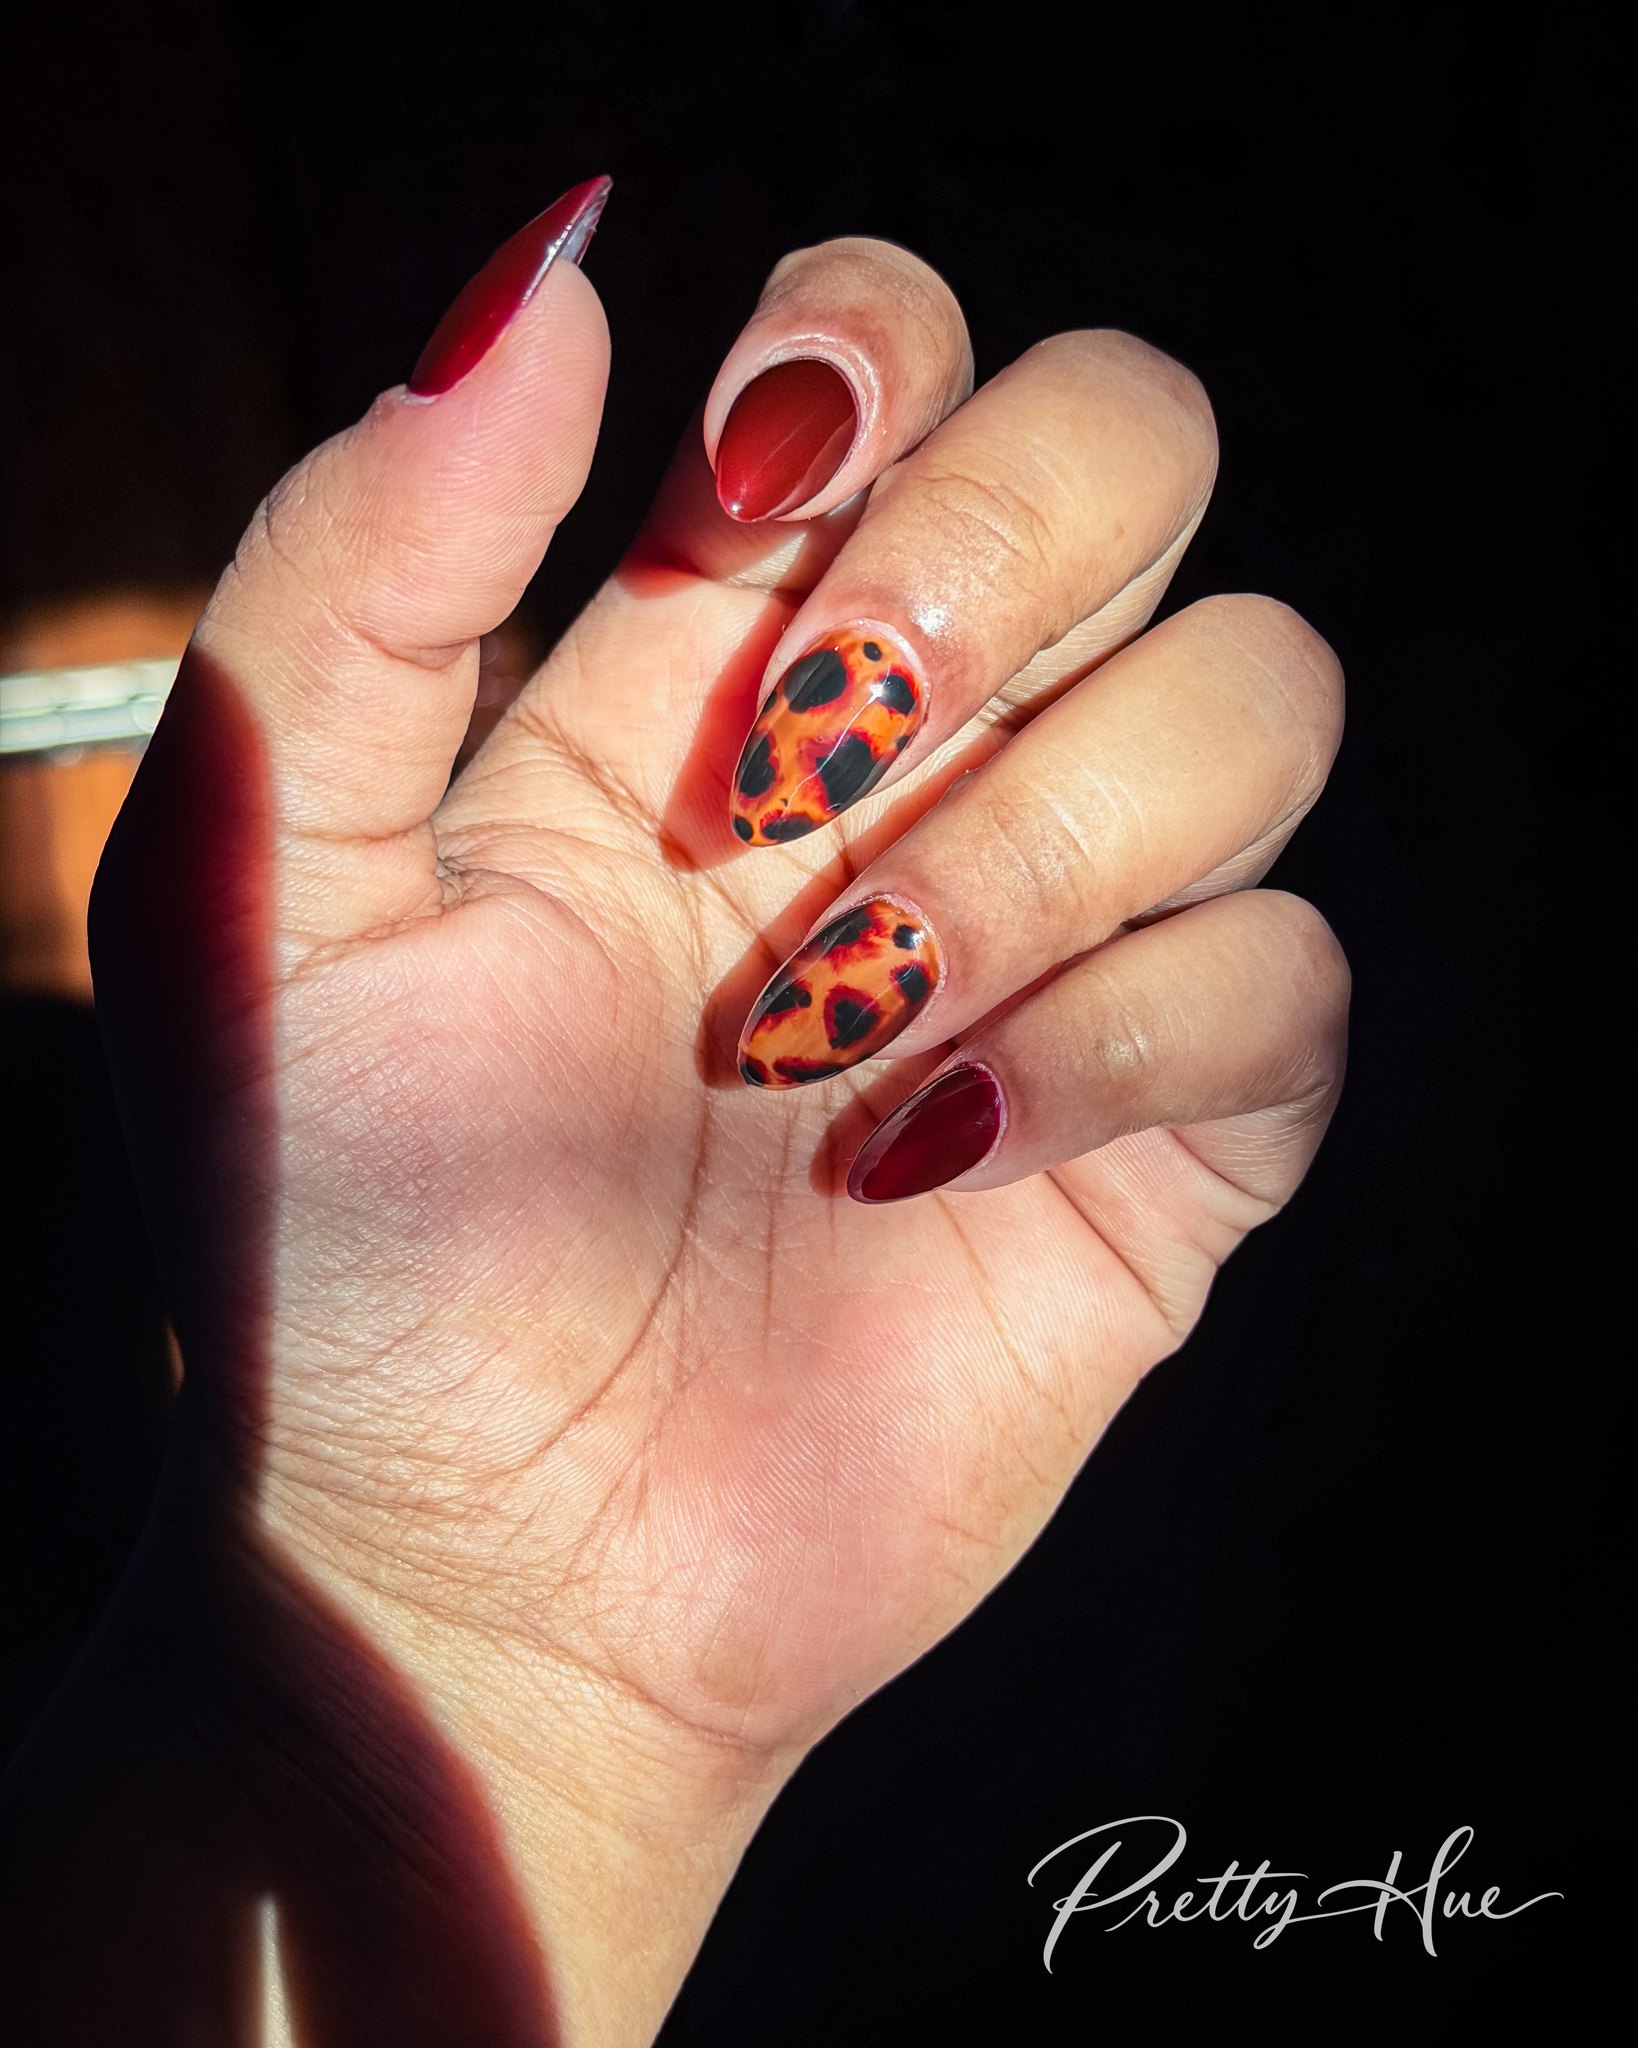
Shape Almond · Length Medium · Technique Tortoiseshell accent · Time About 2 hr · Level Intermediate
Deep burgundy on three nails and glossy tortoiseshell on the middle and ring fingers. Both have the same warm undertone, so the set looks put together without trying too hard. It looks especially good in sunlight.
How to paint it
- Paint your thumb, index and pinky in two thin coats of deep burgundy gel, curing each coat under the UV lamp.
- On the two accent nails, lay down a sheer amber or honey jelly gel and cure.
- Brush on a layer of blooming gel (don’t cure it), dab in brown so it spreads into soft patches.
- Add a few black spots on top of the brown patchy spots for depth and then cure.
- Brush a thin layer of jelly brown gel over the whole accent nail to diffuse all the bloomed colour, then cure.
- Finish with a glossy no-wipe top coat and a full cure.
2. Burgundy plaid nails
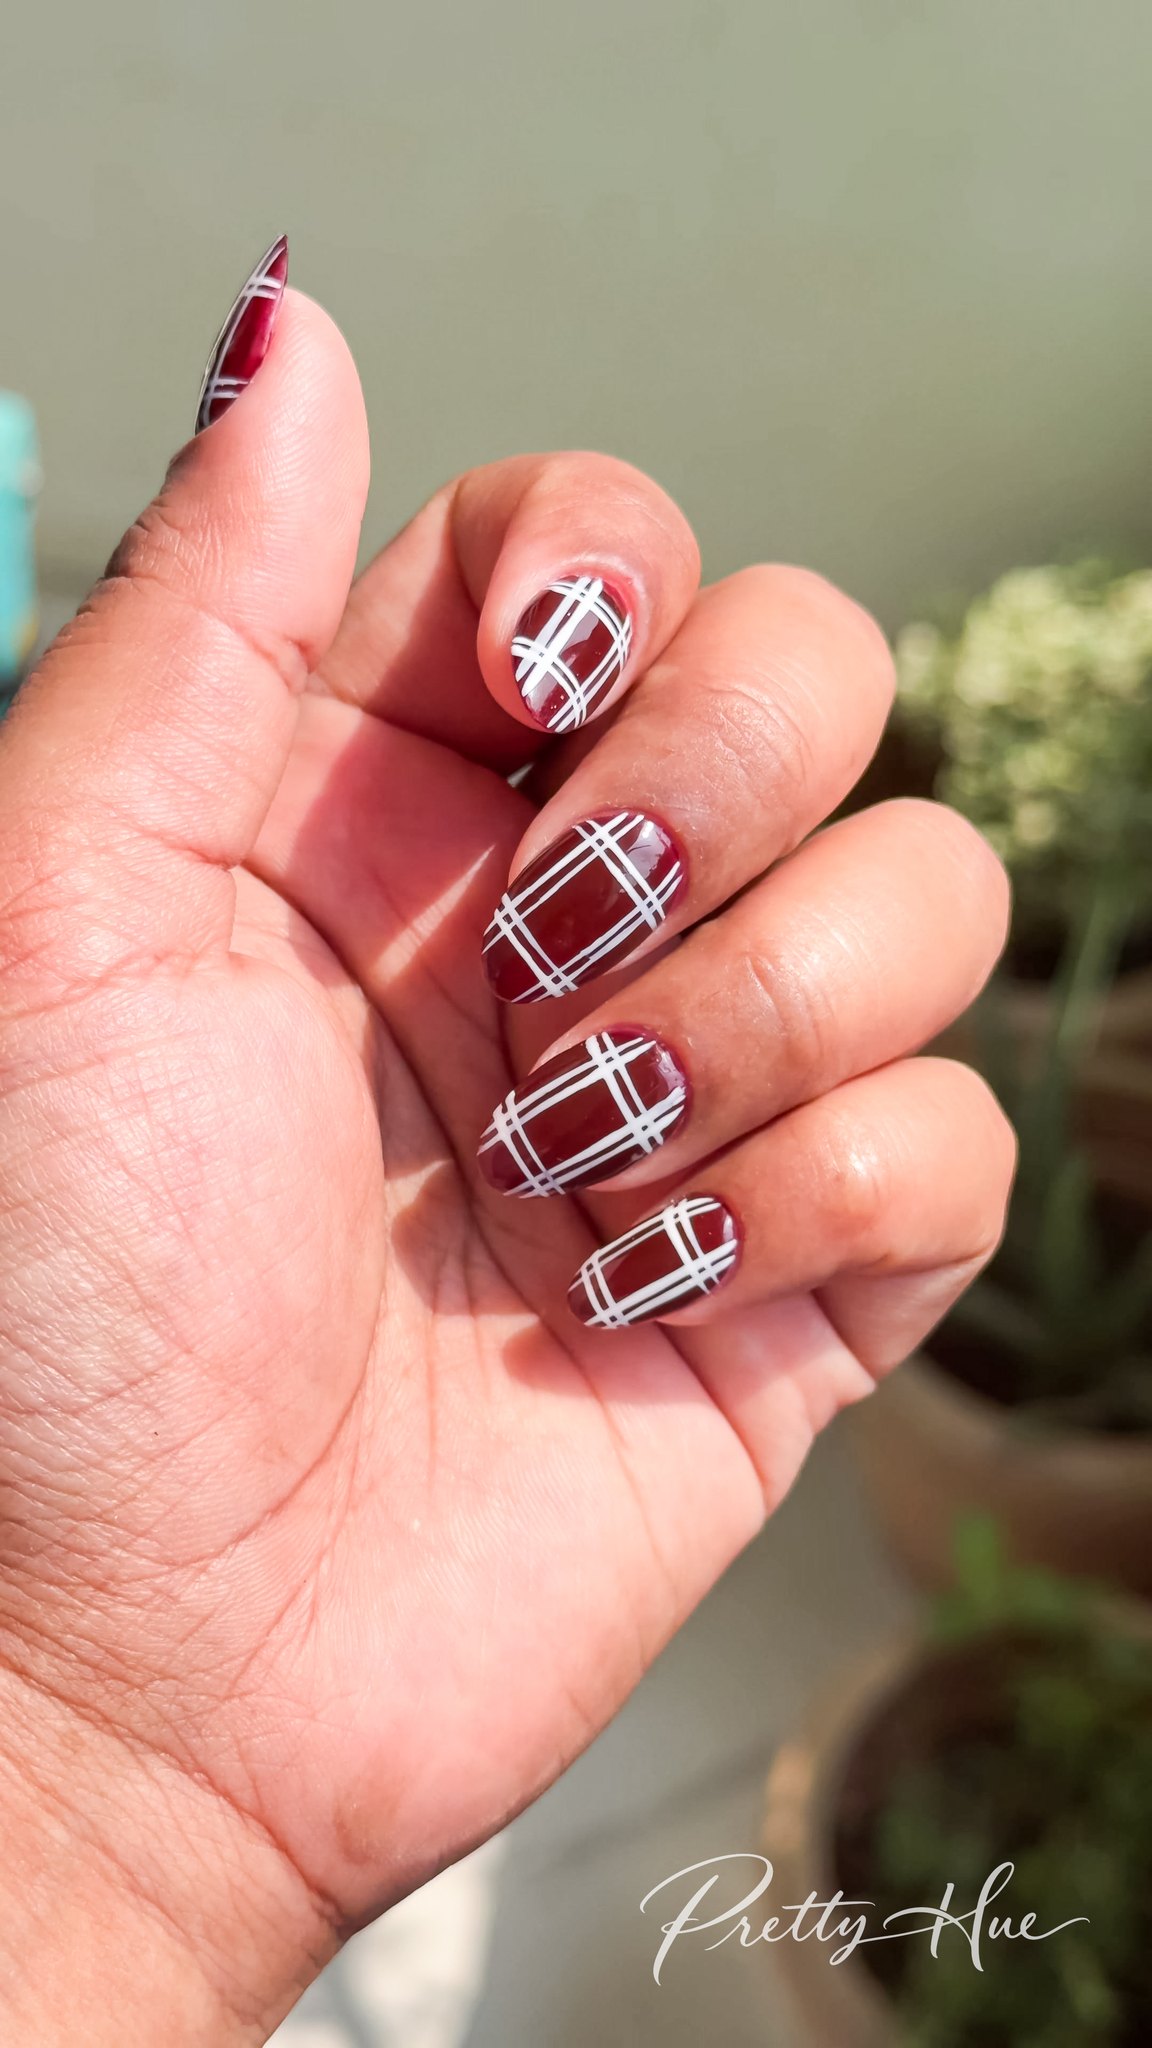
Shape Short oval · Length Short · Technique Line art (plaid) · Time About 1 hr · Level Intermediate
Nothing says fall faster than plaid. White lines over burgundy keep it clean and a little graphic, and it works really well on short nails.
How to paint it
- Two thin coats of burgundy gel, curing each one.
- With a thin striping brush, pull two close white gel lines down each nail, then cure so they stay crisp.
- Cross them with two lines going sideways and cure again. The spacing doesn’t have to match on every nail.
- Float a glossy top coat over gently and do a full cure.
3. Burgundy polka dots with a 3D bow


Shape Short coffin · Length Short · Technique Dots + 3D bow · Time About 40 min · Level Beginner
Tiny white dots on burgundy, with one cream bow on the ring finger. It’s cute without being too much, and the bow makes it look way more complicated than it is.
How to paint it
- Two thin coats of burgundy gel on every nail, curing each coat.
- Use a small dotting tool for the white dots, and re-dip every two or three dots so they stay the same size. Cure.
- Stick a small cream 3D bow onto the ring finger with a small bead of rhinestone glue and cure it in place.
- Top coat around the bow, not over it, so it keeps its shape, then do a full cure.
4. Brown, pink cat eye and creamy white mismatched nails

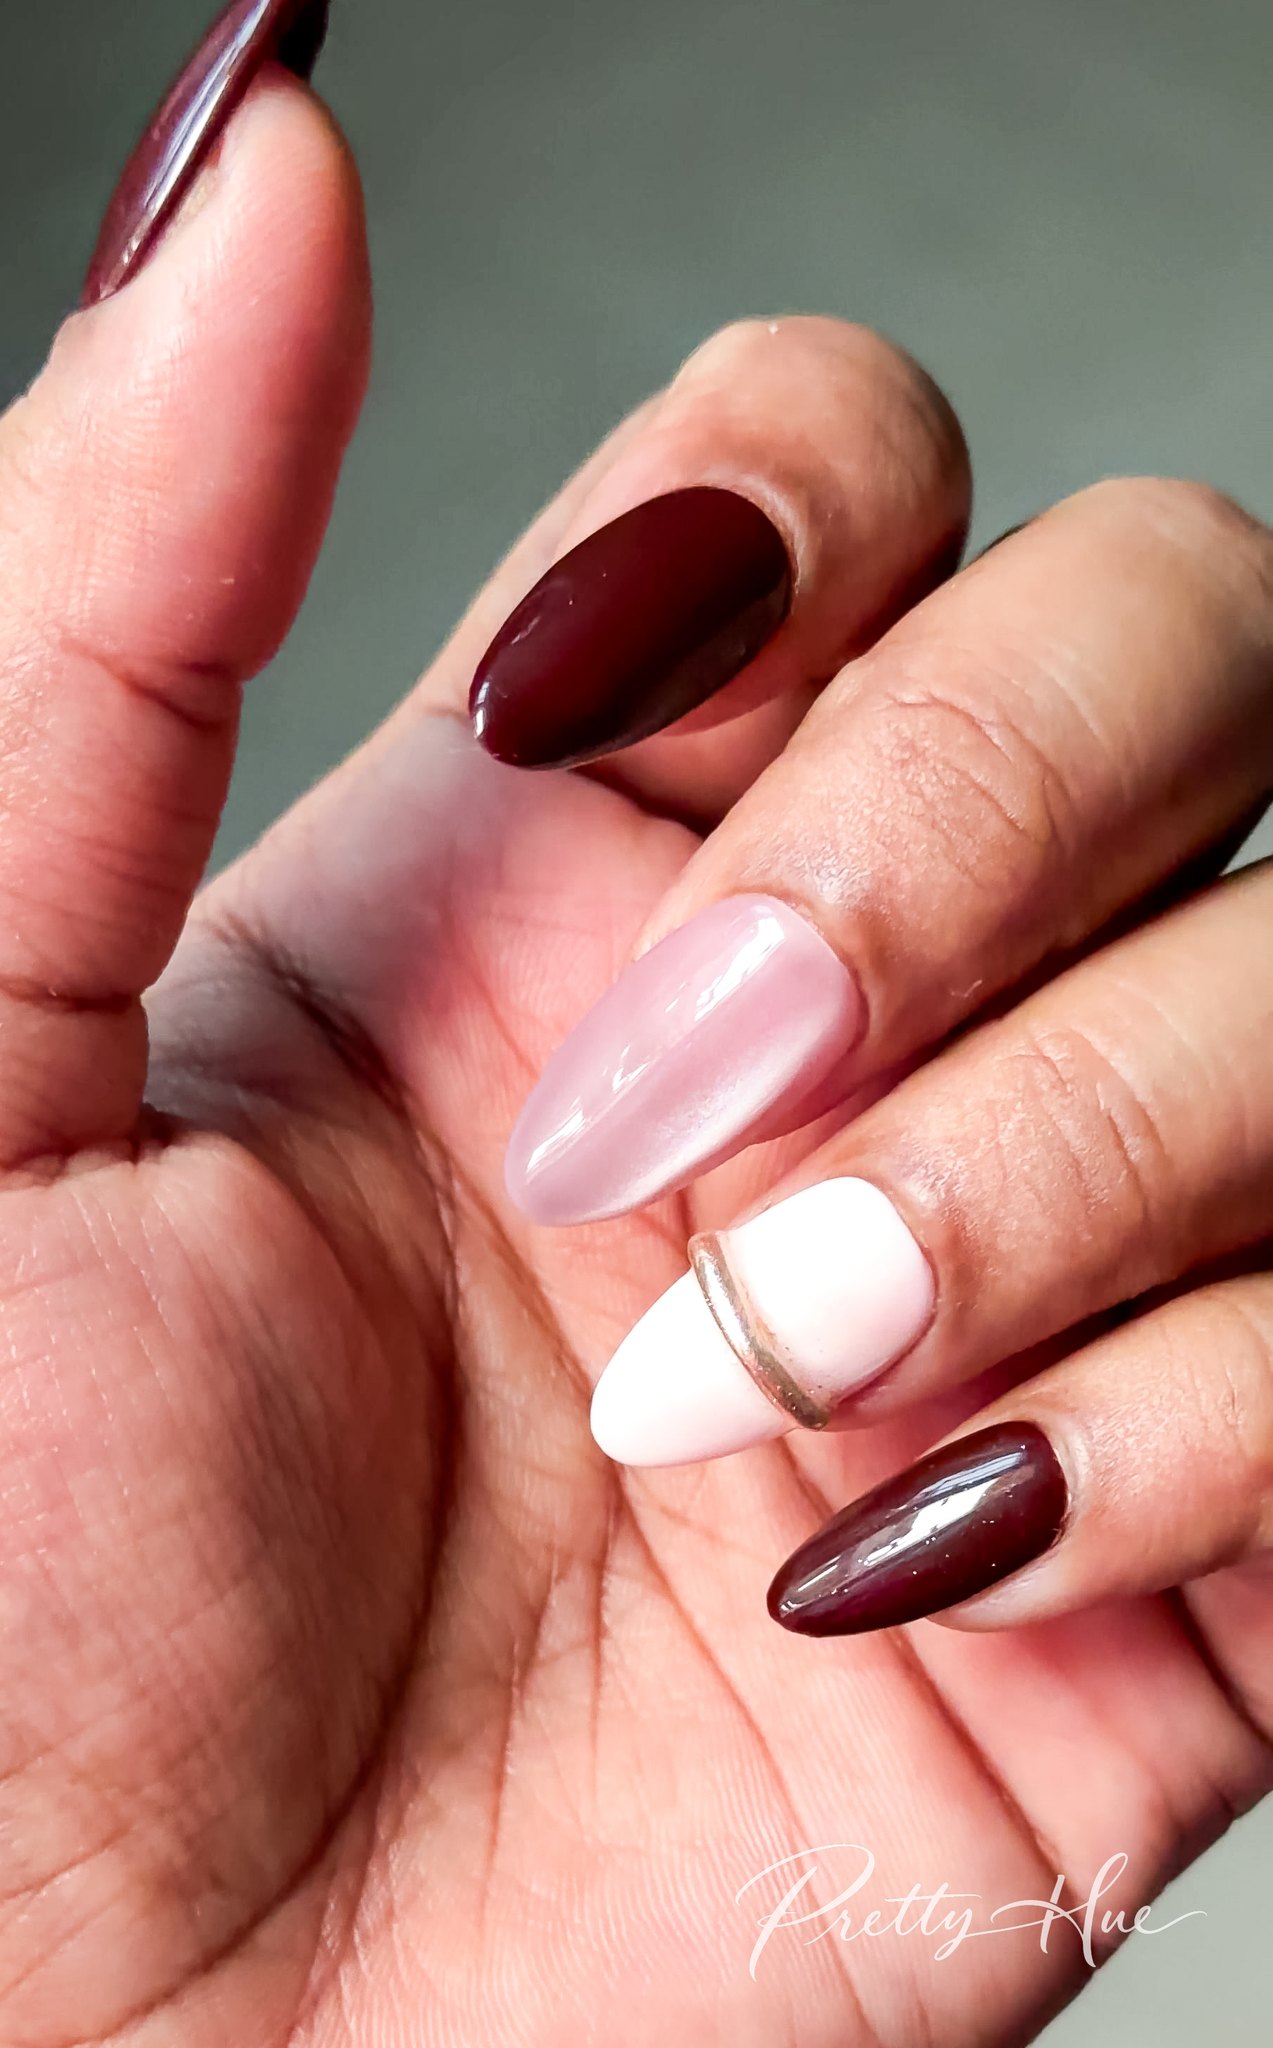
Shape Almond · Length Medium · Technique Mismatched + cat eye + 3D chrome · Time About 1 hr · Level Intermediate
Glossy chocolate brown, one pink cat eye nail, and a creamy white nail with a raised 3D gold chrome ring. Mismatched sets are everywhere right now, and keeping all three shades soft and warm stops it from looking random.
How to paint it
- Paint the brown nails in two thin coats of glossy brown gel, curing each coat.
- On one nail, paint two coats of pinkish nude gel polish, curing each coat. Then paint a pink cat eye gel on top, hold a magnet close for a few seconds to pull the shine into a soft band, then cure.
- Paint one nail creamy white gel and cure.
- Apply a Russian manicure matte top coat to that nail. The matte surface stops the chrome powder from sticking to the whole nail, so it only grabs onto the ring. Then make a small ring with carving gel, stick it onto the nail and cure. I used carving gel because it gives the ring a 3D effect: it is thick and holds its shape, so the ring stays raised instead of lying flat.
- Paint no-wipe top coat on top of the ring and cure. Rub gold chrome powder onto the ring, then secure it with the same no-wipe top coat and cure.
- Seal everything with a glossy no-wipe top coat and a full cure.
5. Full tortoiseshell gel nails
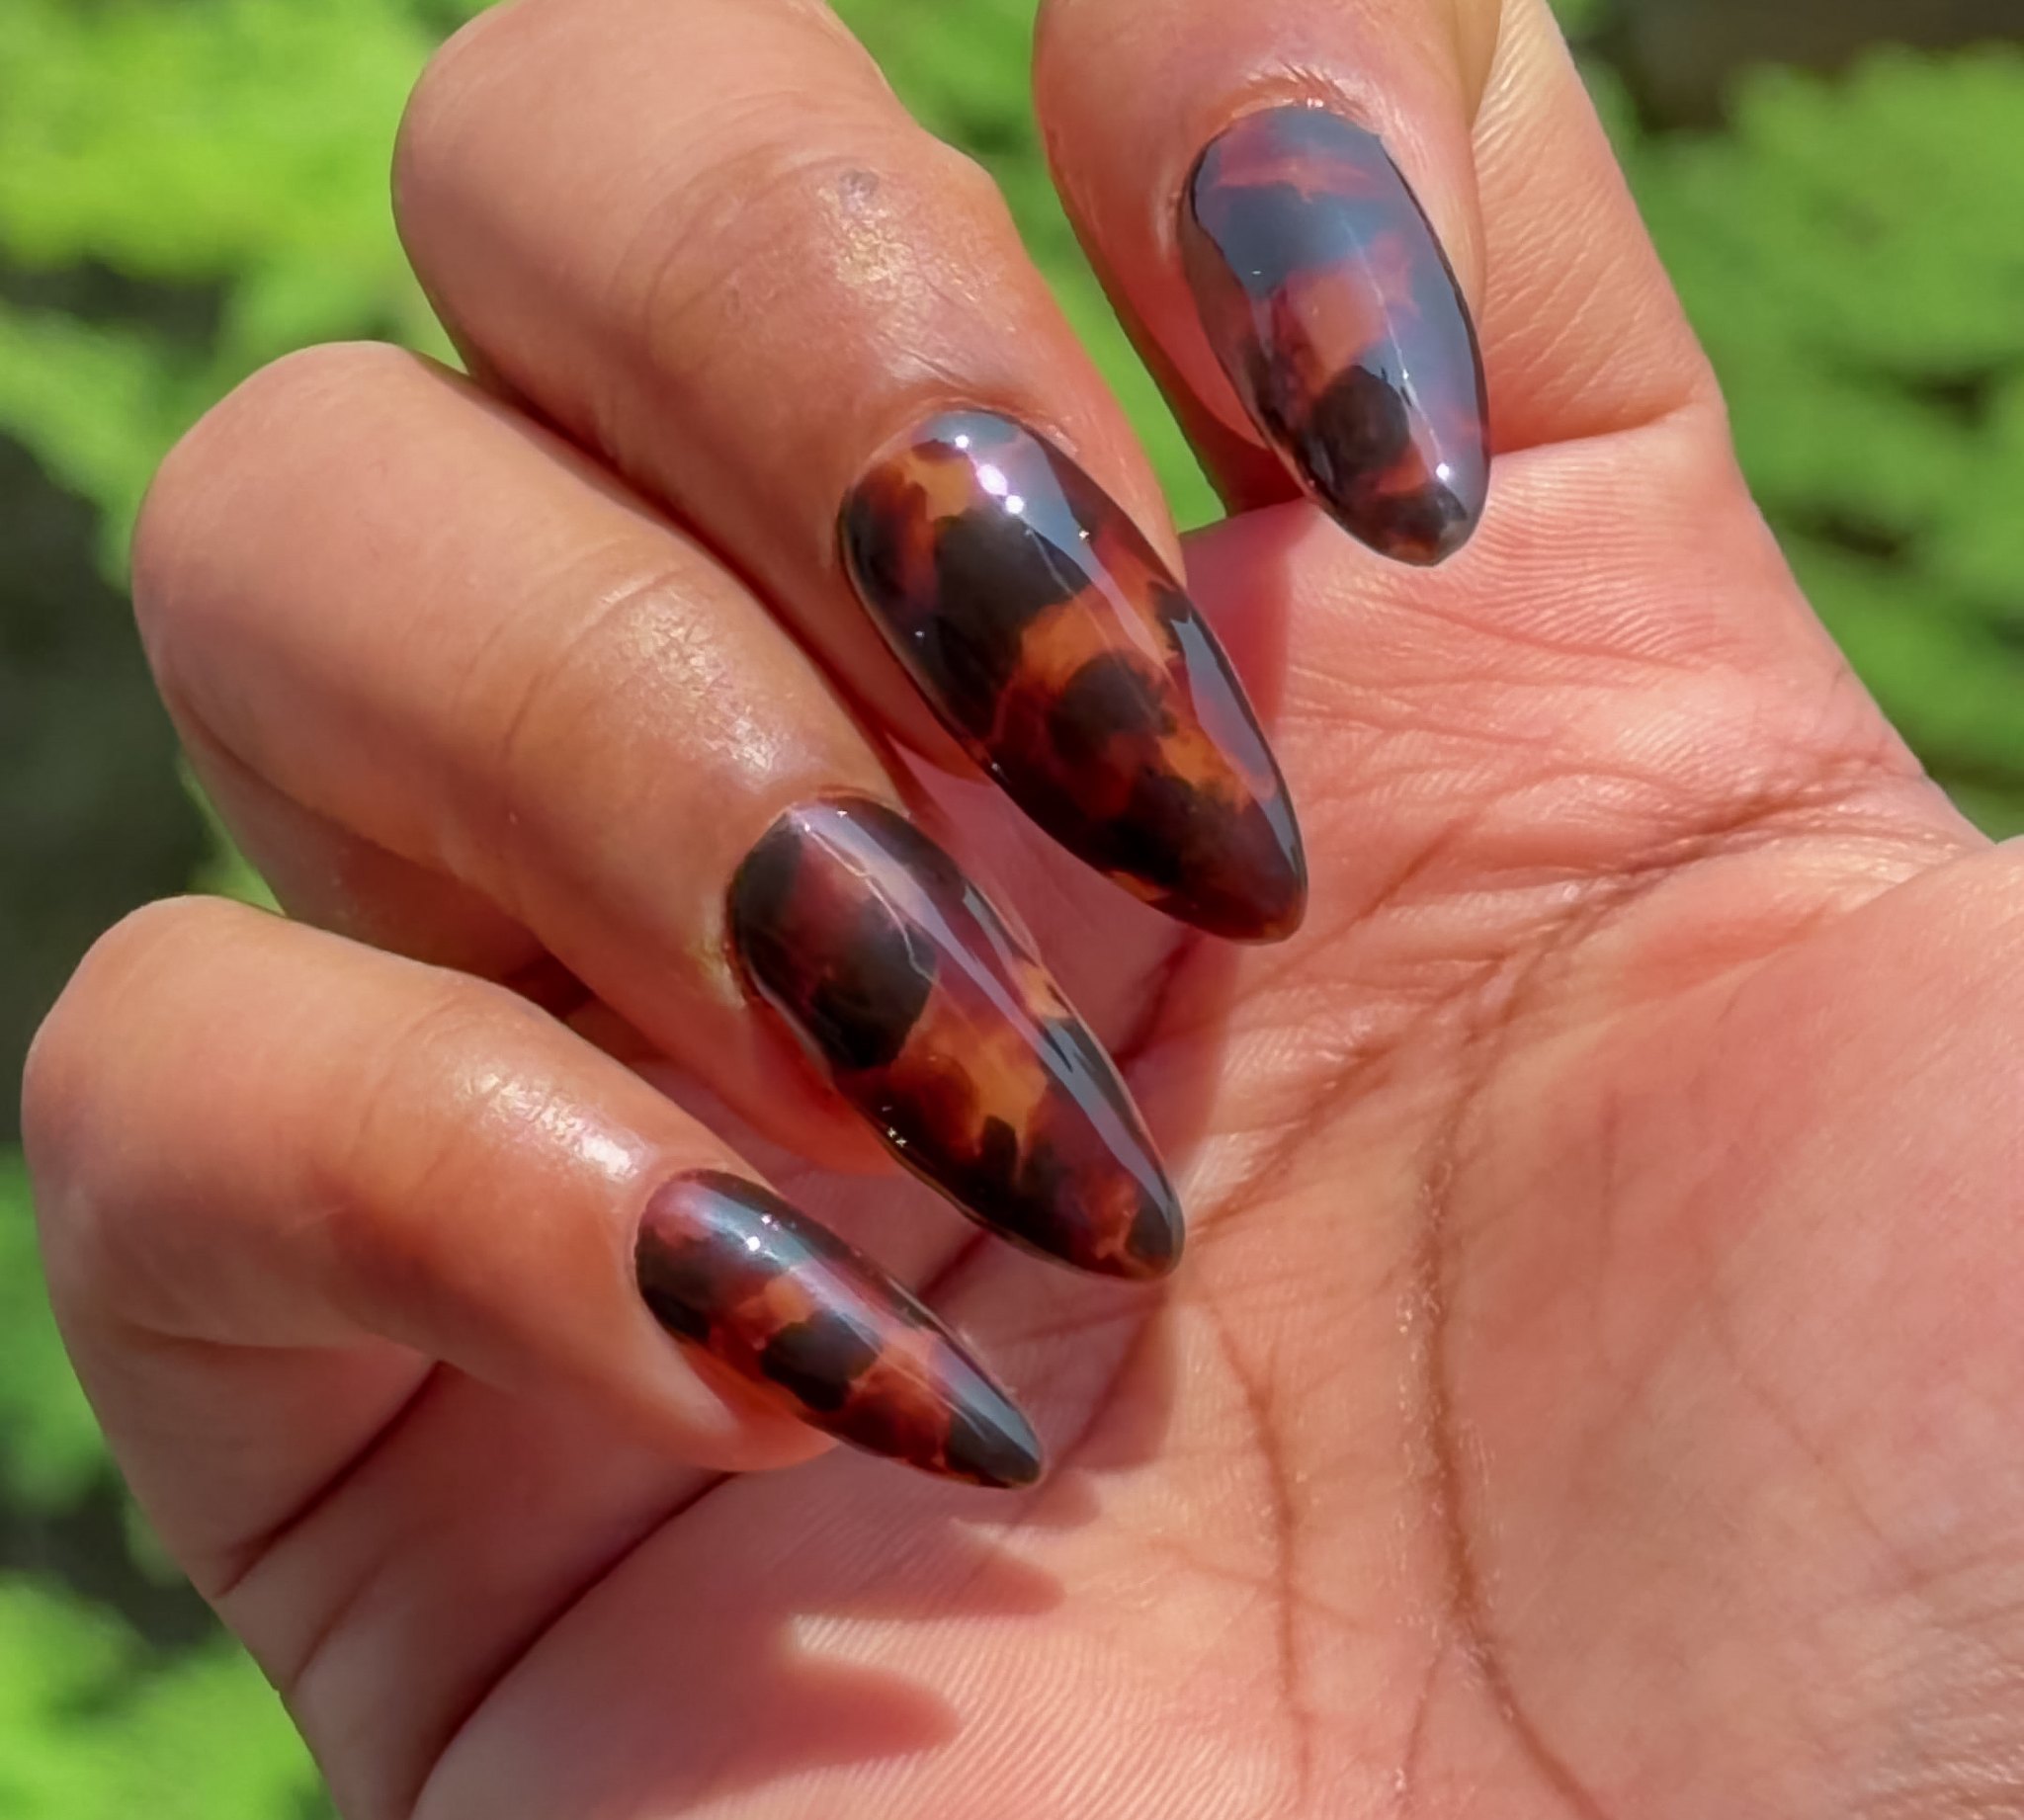
Shape Almond · Length Medium · Technique Gel tips + tortoiseshell · Time About 2 hrs · Level Intermediate
Every nail in glossy tortoiseshell on soft gel tips. It’s the longest set here, but the depth is worth it.
How to paint it
- Prep the tips, then a thin base coat. Cure.
- Paint a sheer amber jelly gel base and cure.
- Float on a layer of blooming gel (don’t cure), then drop in dark brown and let it spread into soft patches. Don’t cure yet.
- While everything is still wet, add a few random black spots on top for depth, then cure everything together.
- Brush a thin layer of jelly brown gel over every nail to diffuse all the bloomed colour, then cure.
- Finish with a thick glossy no-wipe top coat and a full cure.
6. Burgundy and blue mismatched nails with stars and polka dots


Shape Almond · Length Medium · Technique Mismatched: polka dots, plaid + star tip · Time About 2 hr · Level Intermediate
Burgundy and a pale icy blue, mixed and matched across every nail: blue with burgundy polka dots, burgundy with pale blue dots, burgundy plaid, blue with burgundy plaid, and a pinkish nude nail with a burgundy tip and a little pale blue star. No two nails are the same, but sticking to just two main colours keeps the whole set looking planned.
How to paint it
- Paint two nails in pale icy blue gel and two nails in burgundy gel, two thin coats each, curing after every coat.
- On the star nail, paint two thin coats of pinkish nude gel, curing each coat, then paint a burgundy tip and cure.
- Use a small dotting tool for the polka dots: burgundy dots on the blue nail and pale blue dots on the burgundy nail. Re-dip every two or three dots so they stay the same size, then cure.
- For the plaid nails, pull two close lines down the nail with a thin striping brush (pale blue on burgundy, burgundy on blue) and cure, then cross them with two sideways lines and cure again.
- Paint a small pale blue star on the burgundy tip with the same thin brush and cure.
- Finish with a glossy no-wipe top coat and a full cure.
7. Glazed brown French tip nails


Shape Almond · Length Medium · Technique French tips + glazed finish · Time About 1 hr · Level Intermediate
A sheer pinkish nude base with thin brown French tips and a pearly glaze over every nail. Soft, glossy and easy to wear all through fall.
How to paint it
- Brush on a thin layer of clear base gel to smooth the nail surface, then cure.
- Paint two coats of sheer pinkish nude gel, curing each coat.
- With a thin liner brush and brown gel, paint a crisp, thin French tip on every nail, then cure.
- Brush on a layer of no-wipe top coat and cure, then rub pearly chrome powder over every nail, tips included, for the glazed finish.
- Seal with a glossy no-wipe top coat and a full cure.
8. Brown cat eye nails with cream polka dots


Shape Almond · Length Medium · Technique Cat eye + dotting · Time About 1 hr · Level Intermediate
A silver cat eye over dark brown, layered under brown jelly so it glows a warm brown in the sun, with tiny cream polka dots on every nail. Cosy, a little playful and very fall.
How to paint it
- Brush on a thin layer of clear base gel to smooth the nail surface, then cure.
- Paint two coats of dark brown gel, curing each coat.
- Paint one coat of silver cat eye gel. Before curing, hold the magnet over the nail to pull the shimmer into a soft glowing band, then cure.
- Layer two coats of brown jelly gel over the cat eye, curing each coat. The silver shimmer glows through the jelly and turns a warm brown, which is exactly the shade I wanted for fall.
- With a small dotting tool and cream gel, add tiny dots scattered over every nail. Re-dip every two or three dots so they stay the same size, then cure.
- Finish with a glossy no-wipe top coat and a full cure.
Are burgundy fall nails still in style?
Yes, every year. Burgundy fall nails never really go out of style, because burgundy, cherry and brown are basically the fall color palette: red wine, falling leaves, cozy knits. This year it’s leaning glossy and a little mismatched, so try pairing burgundy with glossy brown, a pink cat eye nail or creamy white. Burgundy also works for Halloween: one of my favourite easy Halloween nails is glossy burgundy with a silver chrome spider web.
What nail shape looks best with dark fall colors?
Almond is the most flattering shape for burgundy fall nails and other deep shades, because the tapered tip makes your fingers look longer. If you keep your nails short, a soft round or short almond keeps dark colors looking neat instead of heavy.
How do I stop dark polish from staining my nails?
Always use a base coat. Dark reds and browns have strong pigments that can leave bare nails yellowish, and a base coat stops that from happening.
If you try any of these burgundy fall nails, tag me @paintedbyprettyhue on Instagram. You’ll find more in fall nails, and I post a new design on Pinterest every week. For something brighter, see my 10 burnt orange nail designs.

